Visit my Patreon Page for more painting instruction and Paint Along Videos!

Saturday, February 28, 2015

How to Add a Figure to a Pastel Landscape Painting part 2


'Making Tracks'                6x6                  pastel             ©Karen Margulis
click here to purchase $50
I want to tell a story with my paintings. Adding a figure to my landscapes sometimes helps complete the story. But I don't like the figure to overwhelm and take away from the landscape. It's a fine line because we are naturally drawn to figures. They do become important. 

I try to find the right balance by merely suggesting the figure. They are usually small and they are simply shapes that suggest a figure. In yesterday's post I demonstrated how I add a larger figure. You can read it here. Today I am sharing how I add smaller figures to a landscape. 


I begin with a rough sketch. I am using my recycled mat board. I like the purples and oranges of the original painting and the texture of the underpainting! I make a fat mark where I will place my figure (a cross country skier)


I develop the entire painting before I do anything to the figure. I know where he is going but I finished the surrounding landscape up to the mark where he will be. I know I will be able to paint him on top of the background because he is so small (about one inch)


When I am ready to add the figure I make some marks with my darkest value. I typically use a dark blue or purple. I try to get the gesture of the figure with these dark marks. I add a lighter value to his back to begin creating the form.


Next I add another shade of blue for the pants and a small dot of red for the hat. I also decide to add a tiny dot of brown/tan for his face.


I continue with a tiny for of red for his mitten, a brown line for the skis and a thin blue line for the ski pole. I use the snow color to refine the shape of the figure.
All of these tiny marks are made with the edges of soft pastels. I used Terry Ludwig pastels for this figure.


I add a little shaved snow to complete the painting and I am finished! 


Friday, February 27, 2015

Don't Toss that Plein Air Painting!

'Inspiration'                 11x14                pastel                 ©Karen Margulis
purchase painting here $165

Spring is coming! It may be hard to believe as many of us are still buried in snow but it is coming. With spring comes the itch to get outside and paint. Maybe you are already a dedicated year round plein air painter. Or maybe like me you are an occasional plein air painter. Maybe you will try it for the first time. I have a thought for all of us who will choose to brave the elements and paint outside this year.

Don't throw away your plein air paintings! Learn from them instead. Think of your paintings as homework.

Often our plein air efforts don't please us. It isn't easy. We have to drag our equipment around, set it up and find something to paint all while dealing with sun, wind, hot, cold, bugs.... It can be overwhelming. There are so many choices. We often put pressure on ourselves to do a good painting. So when we struggle it is frustrating.

my original plein air study
When I paint outside I have a different set of expectations. I don't plan on painting a masterpiece or even something frame worthy.  Instead I look at my paintings as my homework. They are exercises. Simple studies that I can learn from and use back in the studio.

The most important lesson I usually learn from my studies is how to see the true colors of the landscape. Photos don't always capture the subtleties of the true colors. Take a look at the painting above. It is one of my plein air studies. I have photos of this same place and they are dull compared to the colors I saw while painting on location. I used the study to paint a larger piece in the studio. It is much more authentic than any photo reference.

So get out there and paint this year.....Nature is your classroom and your paintings are your homework!

Thursday, February 26, 2015

New Pastels....Reviewing my New Unison Set

'In John's Meadow'              8x10                  pastel             ©Karen Margulis
sold
I didn't need another stick of pastel. But I couldn't just walk away and leave this box of lovely colors. It needed me!  I went to the Art Materials Expo on Sunday with no intention to purchase pastels. I was on the hunt for new and interesting papers. (more on that soon) As I went up and down the aisles of art supplies I was drawn to the Richeson booth. There is where I found them.....a set of 18 Unison pastels called John's set.


My new set of Unison pastels 'John's Set'
I fell in love with the colors and their story. These were the last colors that Unison founder John Hersey developed before his death. They were beautiful. And with a nudge from my husband I bought the set. (how could I argue with him?)

I could have admired them in the box but I knew they needed to be used. So I bit the bullet and took off the wrappers and broke each stick in half. Now they were ready.

Ready to paint!
I toned a piece of Uart paper and imagined it filled with a Queen Anne's Lace Meadow. I got to work with my new pastels. I like Unison pastels. I have had a few small sets here and there and have enjoyed them. They are soft pastels but not as soft as my usual favorite Terry Ludwigs. They are certainly harder than Sennelier and Schminkes.  Where they shine is the colors. I love every single color! I especially love the subtle soft colors. Look at the wonderful blues and greens in this set!

They went on the Uart paper like butter. I was able to get nice smooth application and layers. I liked the sharp edge of the end of the broken stick to draw fine lines. I did need to add a few lights and a darker green to finish this painting but it as mostly done with my new set.


close up detail

I didn't need new pastels but adding a few more beautiful Unisons can't be a bad thing!  If you are a fan of Unison or just want to learn more I highly recommend a visit to their website....it's great!  They have a step by step look at the process they use to make the pastels...a must see! http://unisoncolour.com/our-story/the-pastel

Wednesday, February 25, 2015

Tips for Adding a Figure to a Pastel Painting part one

'Hurry Up!'               8x10               pastel             ©Karen Margulis
click here to purchase $145
I am not a landscape purist. I like touches of life in my paintings. Birds, bees, buildings and people all add an element of interest to a painting. Sometimes a small figure or even a telephone wire is just what the painting needs. For me it makes me feel connected to the scene....it invites me to join in.

Adding figures to a landscape or cityscape can be a challenge. I am not a figurative painter so it makes it even more of a challenge. I have a few tips that have helped me. 

Most important tip: I remind myself that a figure is just another shape. If I get the shape and gesture accurate the figure will come to life.

I have two approaches to adding a figure to a painting. I will share one today and the other in tomorrow's blog post.


Blocking in the figure

Adding a Larger Figure:


  • When the figure will be larger than an inch I will block in the figure and work on both the figure and the surroundings at the same time. 
  • I start with a dark value and mass in the entire shape of the figure. I try to get the gesture ...how the figure is moving and posing.
  • After the figure is blocked in I begin laying in the shapes and colors of the background.
  • Back to the figure I add lighter values to give the figure some form. I pay attention to the direction and color of the light source.
  • To refine the figure I use negative painting....I make use of the background color to carve into the figure.
  • I use the edges and side of my softest pastel for the figures....they are simply a collection of marks that I apply with bold strokes.
  • I don't worry about faces or features....I keep the figures simple. SIMPLE SHAPES that SUGGEST

Developing the background and refining the figure


Adding the snow
Below is another cityscape with figure done in the same way....she is a collection of simple shapes.

'City Lights'         5x7        pastel      $50


Tuesday, February 24, 2015

A Simple Way To Recycle Pastel Paper


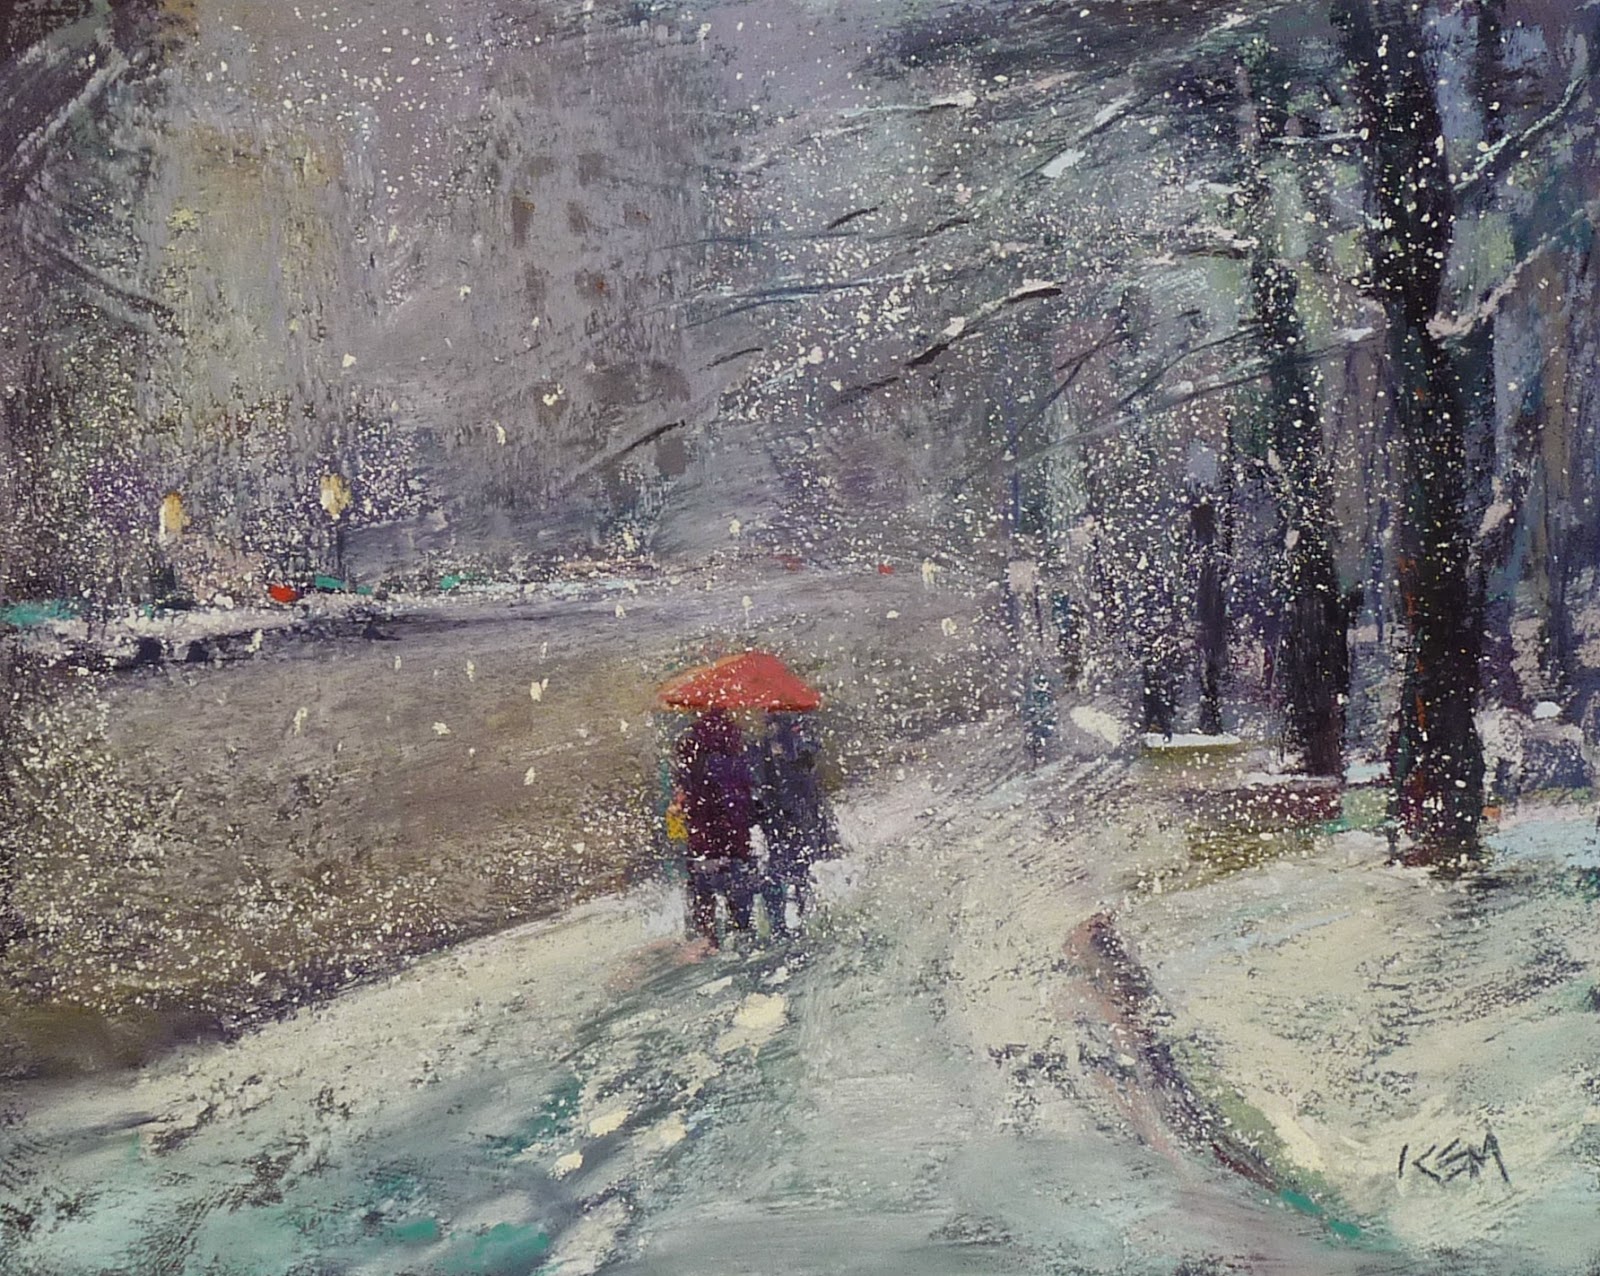
'Two Against One'                    8x10                   pastel               ©Karen Margulis
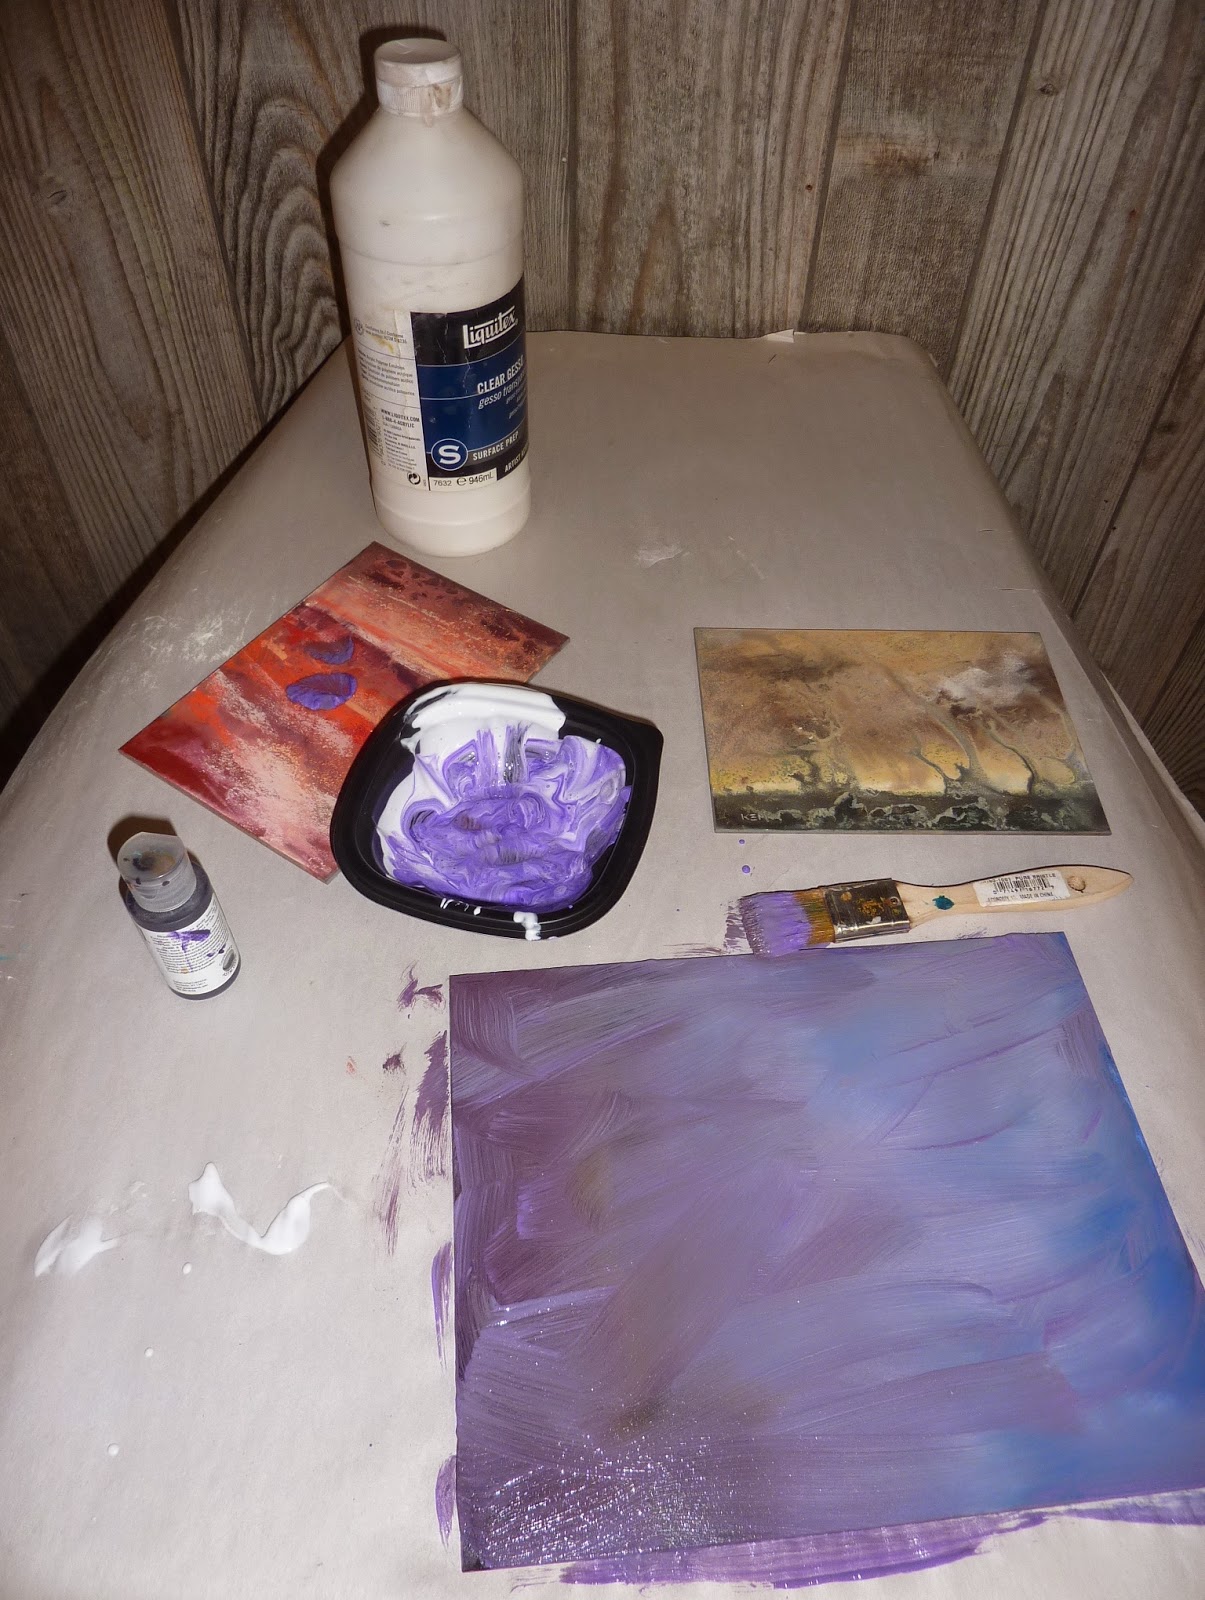
I knew I wanted lots of texture. I had a painting idea but I didn't have the right surface to make it work. I had a stockpile of textured boards that I had made myself with pumice and gesso but they were gone. I needed to make more. I didn't have any pumice though.

I had another idea so I turned up the music and got to work. I took out my bottle of Liquitex Clear Gesso, a gesso brush and a bottle of purple Golden fluid acrylic paint. The clear gesso has just enough grit to add texture to a surface. It would be perfect to cover up some old (bad) paintings. I had several of these duds done on Pastelbord that I have been wanting to recycle.

clear gesso and liquid acrylic paint
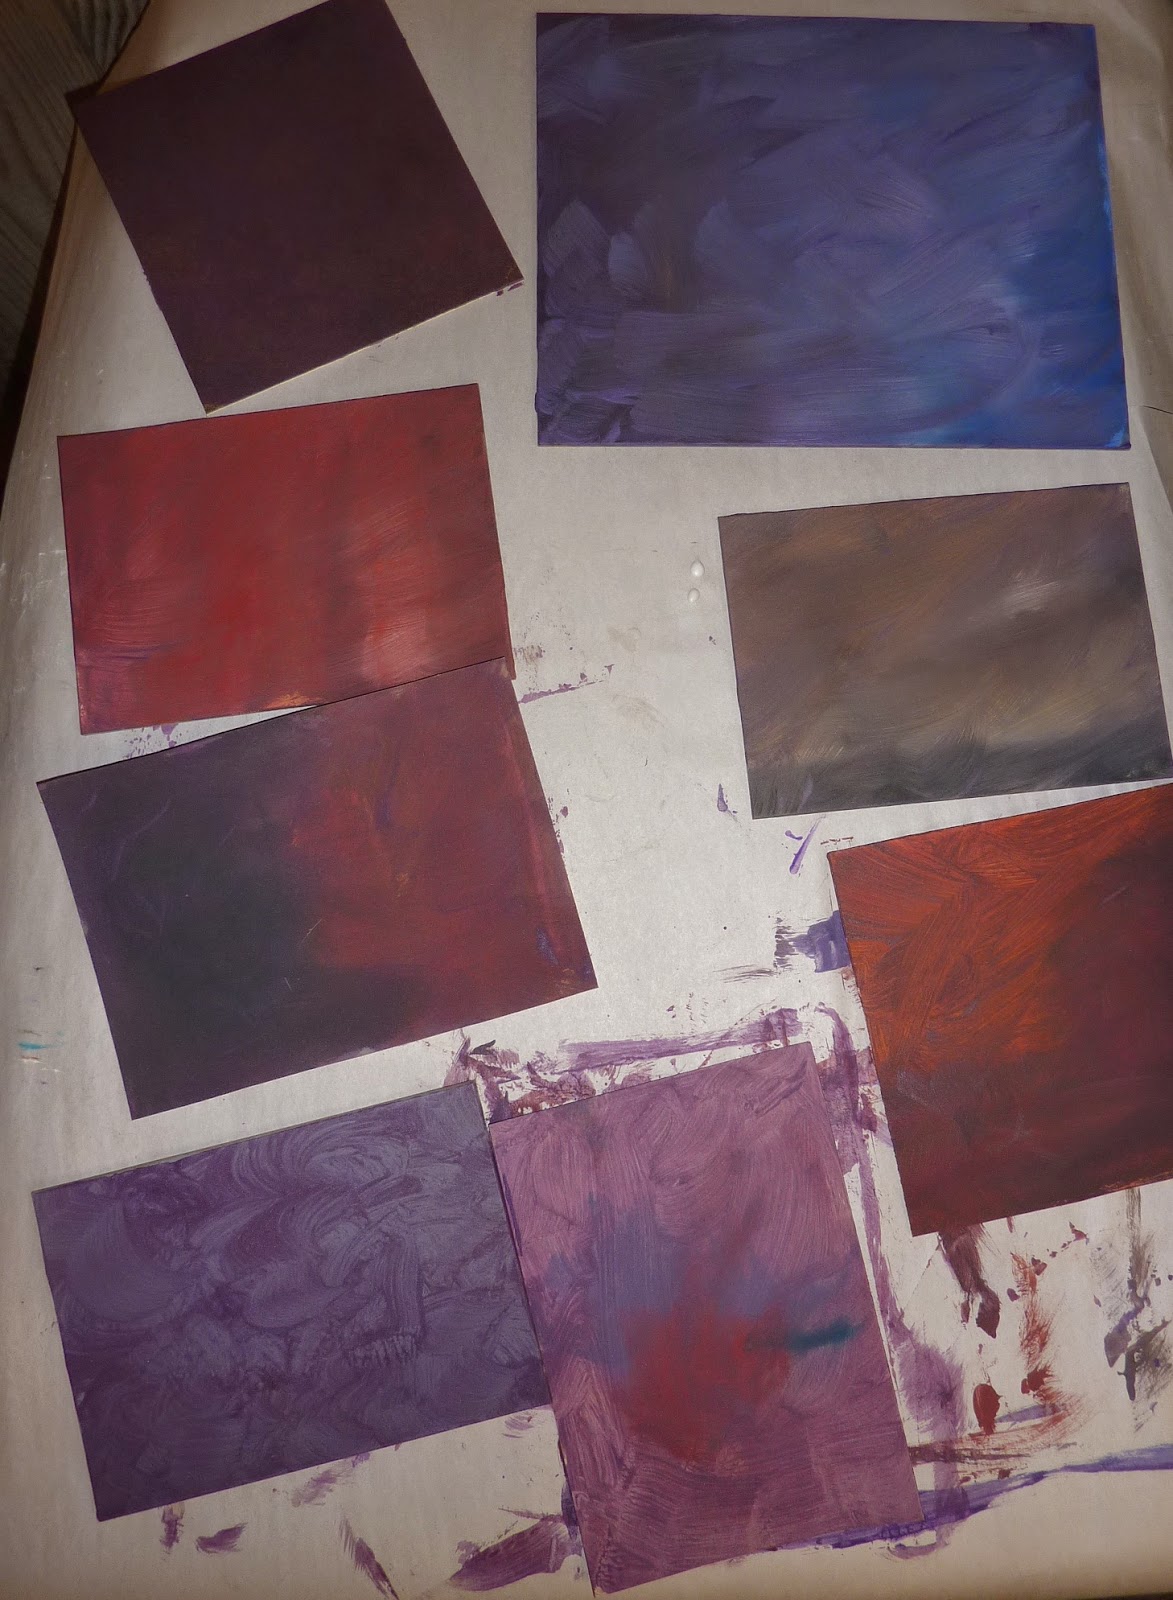
 The clear gesso is colorless so I decide to tint it with some fluid acrylic paint. I choose a deep purple. It was a great choice. The purple mixed with the pastel pigment on the boards and made a wonderful collection of dull middle value toned surfaces. On some of them you can still see ghost images of the previous paintings. I can't wait to use them!  I had enough purple gesso so I coated some old paintings sone on Uart and mat board as well.

The recycled papers and boards

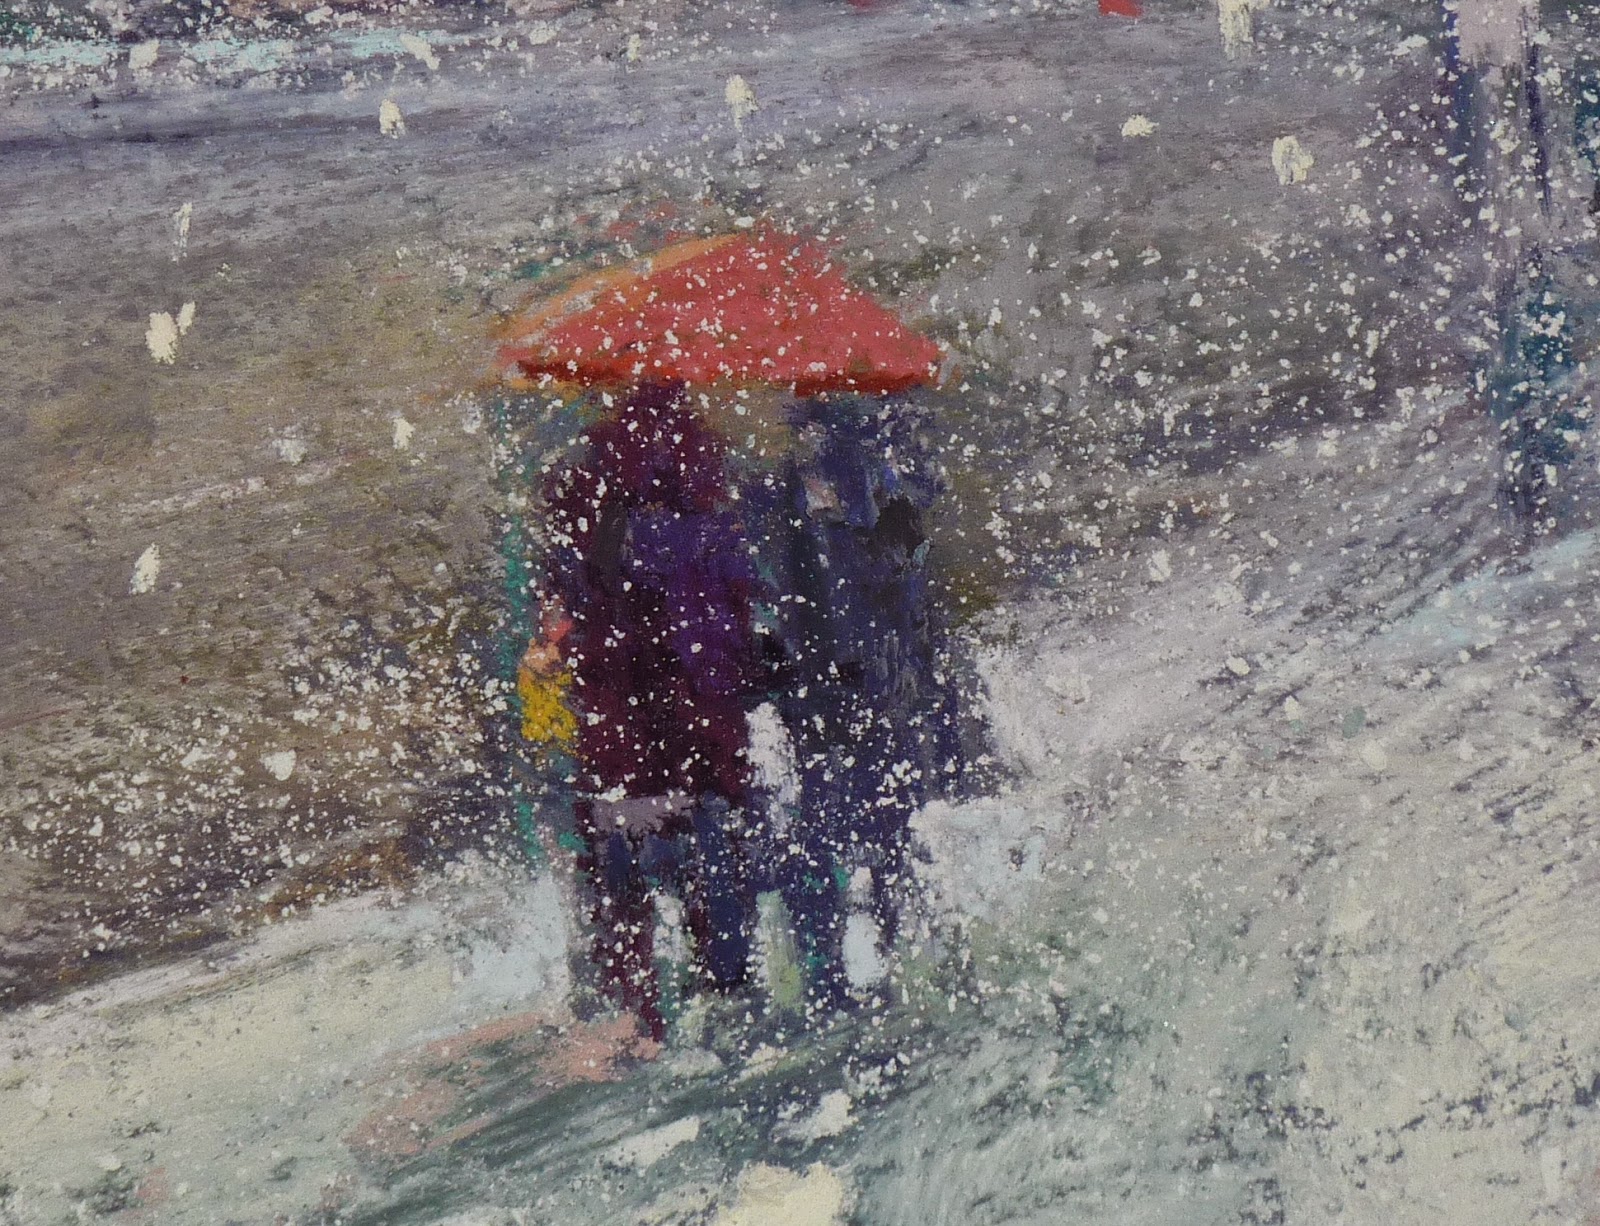
Once the newly recycled boards were dry I got to wok on my painting. I was in the mood for a snow scene. I revisited my Chicago photos and found one that spoke to me.  Below is the preliminary sketch. I played with the umbrella color. I tried yellow first but it was too predictable. Next I tried coral and that made me happy.  When I was satisfied with the details I added some shaved pastel snow dust. The dull purple of the new surface was perfect for my painting.


detail of the figures


Monday, February 23, 2015

Framing a Pastel Painting with Spacers

'Magical Memories'         6x6           pastel             ©Karen Margulis
sold
 Framing is not my favorite part of painting. In fact I only frame paintings when I absolutely have to. I store my finished paintings in boxes, flat with glassine paper in between layers. I sell paintings unframed and ship them packaged in foam core and glassine sandwiches. I do know how to frame but I'd rather spend my time painting!

I do get a lot of questions about framing so today I decided to take apart an old painting that I had professionally framed so I could share how it was done. This is a 6x6 pastel. It was framed with spacers and museum glass. The framer made a neat little package that pops into the frame. Have a closer look:

This is the 'package' taken out of the frame.
This is the framing method used when you don't want to have a mat. The painting is not right up against the glass but it is held away from the glass by the use of EconoSpace Spacers. The spacers are thin plastic strips with a sticky side. The spacers can be cut and attached to the edge of the glass using the peel and stick strip on the spacer.  Visit the FrameTek website for more information and turtorials on spacers.

Here you can see the top layer glass, the black spacer and the backing cardboard

The painting is now ready for the frame. If the painting is already mounted and rigid it is placed on top of the spacers facing the glass. If the painting is not mounted it can be attached to acid free foamcore using hinged tape. This painting was done on a rigid board so it was ready to go.

In this case the frame was deep so it needed some more backing  material so it would be flush to the frame edge. The framer added a piece of cardboard to add the necessary thickness. I would use acid free materials instead of cardboard.

Here is another view of the package of glass, spacer, painting and cardboard backing.

Tape holds all the layers together

Once all of the layers of this sandwich are together the framer used clear tape to secure the layers together. Tape was used on all four corners. Notice that the tape edge does not go past the edge of the spacer. You don't want the tape to show.

Here is a picture of the glass with the black spacers attached.

This little package is now ready to be put into the frame. The tape holds the layers securely and the painting is not touching the glass! To finish the framing job the package can be secured into the frame with points and a point driver. I prefer to use offset clips which are small metal clips that are screwed to the frame. See them here on Blicks.   I like to add backing paper to the back of the frame to add a finishing touch.

Note that Tru Vue Museum Glass was used. This is my preferred glass. I don't care for non glare glass which has a slight hazy look. Museum glass is clear but looks almost invisible. It is amazing!


I was very interested to see how my commissions would be framed. They were unveiled on Sunday at the Northeast Georgia Medical Center Braselton. They are big at 30x40 each. They used a thin wood frame with a wide linen liner. I like how they were framed!

Sunday, February 22, 2015

More on Oil Stain Underpaintings....Your Questions Answered

'Looking for the Sun'              11x14                pastel                ©Karen Margulis
 Painting is so much fun with some viewer participation. I opened up my latest demo for questions and I got some great ones! I posted the  reference photo and the underpainting finished to my Facebook Page and asked away.  I'd like to share some of the questions and my answers to give you some insight into how I resolved this painting.

My reference photo....somewhere along the Northern California Coast
Question: Will you put the fence post and wire in the painting?
Answer: NO! I don't mind fences and wires and sometimes they are needed to tell the story. But fences are tricky....they can often be a true fence or visual barrier to the painting. Especially if the fence goes right across the whole painting....it keeps the viewer from entering. I decide the fence is not necessary for this painting. It is about the flowers....not the fence.
Remember.....we are Artists and not Cameras! We have the power to change the photo to make a better painting. We don't have to put something in just because it is in the photo.

Question: Why did you lower the horizon and show more sky?
Answer:  They sky is not the focal point but it is important to my concept so I needed to show a bit more than the photo. I was drawn to this scene because of the weather...I was intrigued by the overcast with the occasional breaks in the clouds (I remember this because it is my photo) My thought was to show this break of light and how it would showcase the flowers. I needed more sky to show this type of weather condition.

Question: What will you do about the sameness of everything? The flowers, light, etc are all the same. How will you decide what is most important?
Answer: This question goes back to my concept for the painting. Yes the photo shows the light to be flat and everything being much the same. Yes I do need to make some areas more important. I do this by manipulating the lighting. I choose a small area of the flowers and make them brighter and put the rest of the flowers into the shadows (bluer)
Remember we are artists, not cameras.....we need to take the photo and make it better and not be too literal to the scene.


The underpainting is an oil stain underpainting
I chose to do an oil stain underpainting because I wanted rich and vibrant colors to peek through the fairly grayed colors of the final layers of pastel. I addressed some questions about oil stain underpaintings in yesterday's blog post here.

Question: Why did you choose orange and purple for the underpainting?
Answer: I wanted rich and vibrant colors. These underpainting colors are going to be my 'dirt'. I needed some rich darks under the flowers and purple works better than brown or black or gray (boring) I knew the top layers of pastel would be a dull straw color so I thought that a bit of orange peeking through would give it some interest.
I kept the underpainting colors simple so there would be color harmony.

Question: How does the pastel react with the oil paint?
Answer: Just fine! In fact great. The key is to make sure the oil paint is thin enough so there is still some tooth in the paper to accept the pastel. If it is too thick and slick, the pastel won't go over the oil paint very well.
Remember pastel is pure pigment just like oil paint only in stick, dry form. 


starting to add some pastel
I hope this Q & A post is helpful! I will do another one soon so be sure to head over to Facebook and click 'Like' on my KarenMargulisFineArt page.

Saturday, February 21, 2015

Want to Try a Oil Stain Underpainting?

'Quiet Waters'                    11x14                  pastel                 ©Karen Margulis
purchase painting on Etsy $165
Ahhhh the smell of oil paint and Gamsol filled my studio today. It made it feel like a real art studio somehow. Pastel is an odorless medium and I forget how much I love the smell of paint.  I took the oils out today because I was looking for something different to try. It seems I have stumbled onto a series of marsh with water scenes. Whenever this happens I have to work it until the fire burns out.

But in order for the series to be interesting I need to change things up. Different papers, different pastels and different underpainting techniques are all things I look to try. Today I decided to do an oil stain underpainting. It has been awhile since I have used this technique but I do love it. Read on for some tips on making the best of this technique.

Tools of the trade

SUPPLIES NEEDED

  •  Paint: a few tubes of oil paint. I only use alizarin crimson, ultramarine blue and cadmium yellow medium and mix the colors I need. I don't use white since I want my colors to be rich and transparent. I don't use black either but mix red and blue for a nice rich dark.
  • Brush: I use a cheap bristle brush because I like to scrub the paint and the sanded papers are hard on a brush!
  • OMS: which stands for odorless mineral spirits. You can use your preferred brand. I use Gamsol or Turpenoid. Do not use the Turpenoid in the green can. In my experience it doesn't dry as well especially if you use it to do a wash with pastels. You will also need a can or jar for the OMS.
  • Paper: You need a pastel paper or board that can get wet. I prefer Uart paper. Ampersand Pastelbords are an excellent choice as well. For today's painting I used Pastelmat which wasn't my favorite choice. I didn't get the drips I usually get with Uart paper. (I will do a Pastelmat review soon)

the finished underpainting

I love the vibrancy of the oil paint. It makes a rich and colorful underpainting. The trick is getting the paint the right consistency. I call it an Oil Stain because you want to get the paint the consistency of wood stain. I use the OMS liberally when mixing my paint and make a puddle of color the consistency of stain or tea.  If it is too thick the painting will fill the tooth of the paper and you won't be able to layer much pastel. If it is too wet it will just run and it won't stain the paper.

TIP: If you can see brush marks in the paint then it is too thick....thin it with more OMS. Practice, practice and more practice will allow you to know just how much OMS is enough.

As the paint dries the magic begins. The best underpaintings will result in interesting drips that look like root systems.  The Pastelmat absorbed the paint so quickly that it didn't drip. It was a bit disappointing but I still loved the vibrancy of the oil paint and it gave me something colorful to respond to.


For a more detailed tutorial to a Turpenoid wash underpainting see my pdf demo available in my Etsy shop .https://www.etsy.com/listing/162168002/pastel-painting-lesson-demo-pdf

Friday, February 20, 2015

How to Use a Bad Reference Photo

'At the Edge of Forever'                 11x14                  pastel              ©Karen Margulis
sold
I'm not sure what possessed me to use this reference photo. It was a bad reference photo. It was beyond bad. It was downright terrible. It was underexposed. It had so little color it might as well have been black and white. There were several bushes and tree limbs in awkward places and a jumble of docks and boardwalks. I couldn't make heads or tails of them and without my glasses I couldn't even see them.

I decided that the photo is so bad it is good. It is actually a great reference photo if you have a different attitude towards reference photos. I actually prefer bad photos. Bad photos free me to interpret the scene in my own way. I can only improve upon it!


There are two important considerations when using poor reference photos:


  • The photo needs to have good bones. It has to have some possibilities. I ask myself if the photo has good shapes? Interesting arrangement of shapes? Interesting color? Is there enough information for me to use even if I have to change some things? And am I comfortable making the changes?
  • The photo has to be mine. If it is mine then I am able able to recall the moment the photo was taken. I can call up all of my senses and use my memories to infuse my painting with authenticity.
Take today's bad photo. It is my photo. I very clearly remember the place and time I took this photo. It was a special week in a wonderful place with my best friends. We were only at this spot for an hour but I remember it as if it was today. 

Since I can recall it so vividly I am able to make the changes to the photo to better reflect my memories. It was a bit chilly and overcast but bright at the same time. I remember the trees dripping with moss. They had layers of subtle but beautiful colors.  The docks and boardwalks are not important. I remember the trees and their colors and reflections. Here is how I went about interpreting the photo:


The underpainting done with a turpenoid wash on Uart paper
I decided that a turpenoid wash would be a perfect underpainting technique. This would allow me to start the painting with bold and rich color. The drips would help me suggest moss and reflections. I chose to use a creamy yellow in the sky and water which would be the base for the soft glow I wanted.
Once the underpainting was dry I began with the pastel, darks first then the sky and water and then the trees. I spent time working on the negative spaces in the trees trying to give them interesting shapes.

Have a look at your reference photos....don't throw away the bad ones. Spend some quiet time recalling the moment....paint that moment!


Thursday, February 19, 2015

Another Pastel Demo....Another Question Answered

'Seeking Peace'              16x20              pastel                ©Karen Margulis
sold

It was unanimous. Everyone in the evening class chose the same reference photo. I gave my classes a choice for the last demo of the session. There was a choice of five photos of a big variety of landscapes. The marsh was the unanimous choice. Why did they choose it?

They chose it because it looked like it would be the most challenging. We all agreed that the scene was beautiful. The colors and mood were very nice. But it was boring. The class wanted to know how I would handle it. How would I make it more interesting?

My reference photo is a scene from Central Florida
So we analyzed the photo together. We agreed that we liked the colors. We also liked the slight moodiness created by the morning mist that was burning off the marsh. But would that be enough to make an interesting painting? Is color or mood enough? Should there be a center of interest or something that grabs the viewer's attention?

Mood can be enough but it is still important that we arrange the elements of the painting so that the viewer's eye can easily move through it. If everything is the same will we know where to go?

The other issue with the photo was that the values were all very much the same middle value...no contrast at all. The shapes were also very similar....all long narrow bands of color. No variety.  We discussed what we could do to improve this reference.


Here is what I chose to do with the painting:

  • I decided to change the shapes and sizes of the trees and marsh grasses to create more variety. 
  • I also layered the trees and bushed making the back trees cooler. I cooled sown the very warm grasses in the distance to suggest more depth.
  • I liked the hint of water going behind the first bank of grass so I decided to exaggerate and make this a more important part of the painting.
  • I decided that this marsh needed some life. So I added a couple of white egrets....just a hint. They also provide some balance to the weight of the trees and grasses on the left.
painting notes: 16x20 on Uart 500 with a dry wash underpainting in warm colors.