 |
| 'Winter's Palette' 11x14 pastel ©Karen Margulis sold |
When I am painting for a demo or for a video I am multi- tasking. I am painting and at the same time trying to explain what is going on inside my head. I get to the point where I need to step away and this is when the camera usually has to stop rolling. This is when I can slow down and really think about the steps I need to take to finish the painting.
I posted the video demo for this painting on my Patreon page. It is now available for viewing on my YouTube channel. Click here for the link:https://youtu.be/-gB9kQtORtA
The video stopped with the painting in the photo below. After we stopped filming and I took a break, I came back to the painting and refined three areas. Read on to see what I did to finish the painting.
 |
| The painting before the final marks |
- Refine the Center of Interest or Most Important Area: I decided that the darker trees on the left were my focal area. I needed to refine this area while letting the other areas of the painting to have less information. I added more negative spaces in the tree trunks and more sky holes.
- Create the Lead In to the painting and most important area. I needed to have a pathway for the viewer's eye to travel to my focal area. I enhanced the patterns of light and shadow on the snow and I added some detail to a few of the golden shrubs.
- Add the Spices. I wanted to give the viewer a little treat when they arrived at the focal trees...a little eye candy! I chose red violet to paint some little accent marks on the tree trunks.
If you enjoyed the video consider joining my Patreon page for more videos! $4 monthly subscription. www.patreon.com/karenmargulis
 |
| I did a quick color study to test my chosen palette |
 |
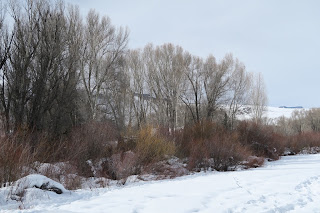
| My reference photo Crested Butte, Colorado |

1 comment:
Thank you so much for posting your reference photo. That really helps me figure out how you get from that to the finished painting, what stays, what goes, what gets tweaked.
Post a Comment