 |
| 'Quiet on the Marsh' 16x20 pastel ©Karen Margulis available $250 |
It looked bad. The painting was damaged and if I didn't know better I would say it was beyond repair. But I DO know better! I discovered this 16x20 demo painting in a pile during my studio cleanup. I put is aside thinking that it probably could be fixed. Today I saw the painting again peeking out at me and even though I should have been cleaning and organizing I decided to do the repair! (it's no wonder my studio stays unorganized!)
So what was the problem with the painting? It had been stacked against another painting without any protection. During travel home from the workshop the two paintings rubbed together and the result was pastel transferred from one painting onto the other. Look at the photos below to see the large marks in the sky of my painting.
 |
| The damaged painting |
 |
| closeup of the pastel marks on the sky |
When I was new to the pastel medium I would have considered this a total disaster. I would have been afraid to try to fix the sky thinking that the dark marks would just make mud if I tried to paint over them. The answer is an easy fix that allows one to simply remove stray marks and unwanted blemishes.
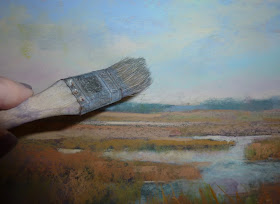
The tool I used was an old stiff inexpensive chip brush. I use this brushes for many things. You can get them at hardware and craft stores for less than a dollar. They are perfect for underpainting and applying pastel grounds and they are also excellent for pastel repairs!
 |
| A simple brush off and the painting is fixed! |
All I needed to do was use the brush to gently brush away the marks. Since they were not pressed into the pastel by hand the pigment was sitting lightly on the top of the painting. Brushing the marks lifted them easily revealing the underlying sky. I was able to brush off all of the marks! Some of them were quite dark and I was actually surprised at how easily they could be brushed off.
The sky underneath the marks was revealed and there was no evidence at all of the damaging marks!
The painting was fixed but while I had it on the easel I decided to clarify some of the other areas and give this previous demo and more finished feeling. I started at the back land mass and wired my way forward. I spent about 20 minutes adding the finishing touches. Now I need to get back to the clean up!!
 |
| A detail of the finished painting |


No comments:
Post a Comment
Note: Only a member of this blog may post a comment.