Visit my Patreon Page for more painting instruction and Paint Along Videos!

Saturday, April 29, 2017

Dreaming of Summer Travels


'Dreamscape'         5x7      plein air pastel           ©Karen Margulis
available $50
It was a cool and rainy day. In fact it was a cool and rainy week. But I was in Iceland and I was prepared for it. Looking through a folder of older paintings I stumbled across these two pastel studies and the memories of that wonderful trip to Iceland came flooding back. It was a week filled with friendship and art. And even though it was cold and rainy it sure was warm inside my friend's wonderful studio and home.


The warm and cozy studio with a fabulous view!
We spent the week immersed in art. Sharing ideas and work. Watching painting DVDs. Looking through art books and of course painting. We also took day trips to discover the beauty of Iceland. I took hundreds of photos. I came home filled with inspiration. But I also came home to a busy schedule of travel. I didn't have enough downtime to process and savor the memories I made in this very special place.

The paintings have a way of bringing me back. I can remember looking out the window at the lupines. It was a moody quiet day with the promise of some sunshine. I chose lavender and violets to create the mood. I left many edges soft to suggest the soft haze of the day.

Photos are nice but paintings show how I really feel about the place. I enjoyed the little jog in memory that these paintings gave me.


'Summer Softness'      5x7      pastel        $50
View from the studio on a sunny day

A collage of some of the paintings done while in Iceland

Friday, April 28, 2017

My Favorite Tip for Attaching Paper to a Painting Board


'Arctic Skies'         5x7        pastel         ©Karen Margulis
available $50
 Say no to the blue tape.  Say no to long strips of tape. Say no to clips that have to be moved around. Say no to rolling up pieces of tape. There is a better way. I am very easy going but I do have one big pet peeve when it comes to painting. My paper must be secured firmly to my drawing board. It has to lay completely flat. There can be no curls or paper moving and lifting. It is difficult to control marks when the paper is curled up at the ends. I also don't like to use a lot of tape for a painting.
I have a solution!

Make Tape Hinges with white artist tape! 


A roll of white artist tape on a dispenser (a must have tool!)

Why not blue painter's tape or long strips of tape?  I avoid using any color tape other than white. I also avoid taping the paper down on all four sides using strips of tape.  Long strips of colored tape are especially dangerous.  Why?  Colored tape will effect how the colors and values in your painting are perceived.

We know that colors change the way they appear when another color is places next to it.  A color may be considered cool until we put an even cooler color next to it.....all of the sudden the first color seems warmer. So if you have bright blue tape or manilla masking tape all around your painting....these colors effect how the colors you put in your painting appear. It may be subtle but it is there! White tape prevents this potential influence.

Not only does colored tape effect the painting....long strips aren't really needed to secure the painting. Have a look at making simple tape hinges:


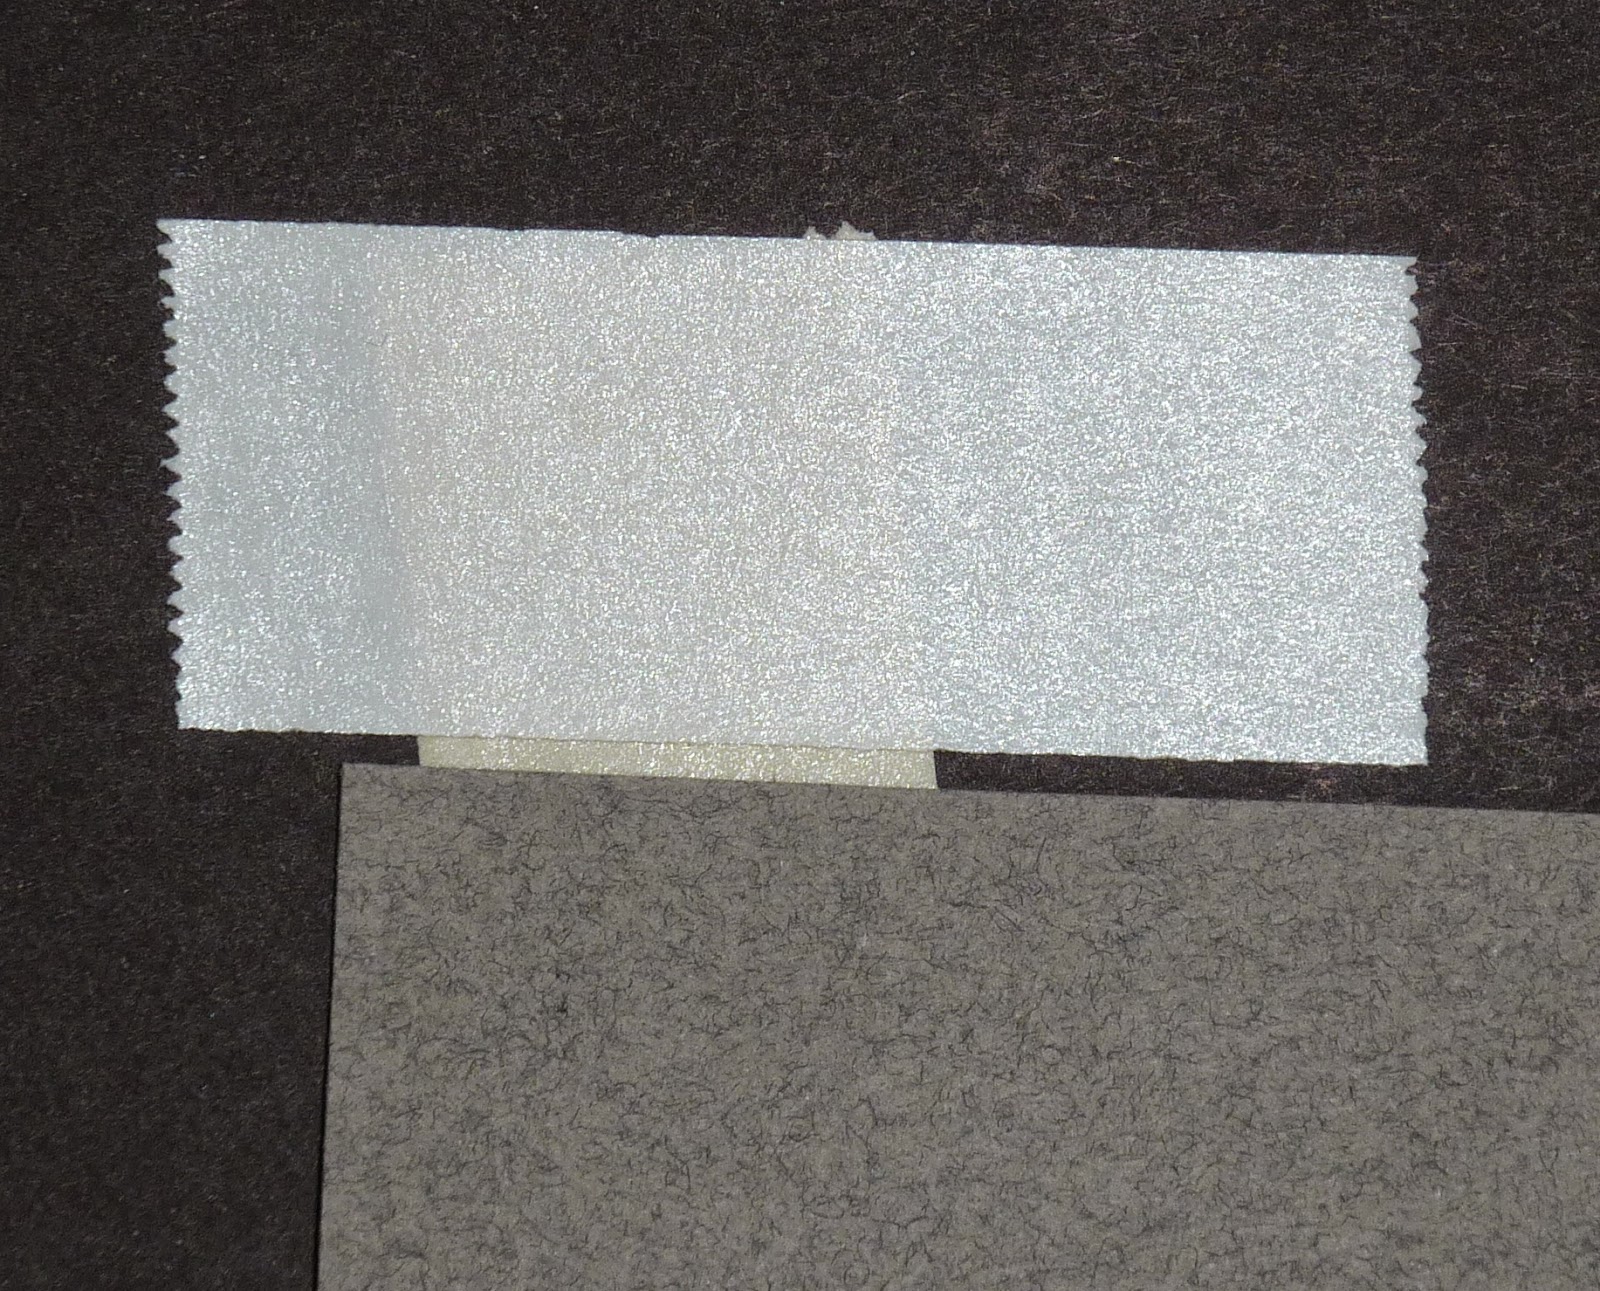
STEP ONE: Tear a piece of white artist tape measuring about two inches long. I use tape that is 3/4 wide. Place the tape on the back of the paper with about an inch of the STICKY side facing out (towards you). I place a piece of tape on all four corners. I will sometimes add a piece of tape to the sides especially if I am going to do a wet underpainting.


STEP TWO: Tear another two inch piece of tape and place it over the sticky side of the corner tape. Voila! A hinge is made. Do the same thing for all four corners.


The beauty of making tape hinges is the economy. I can easily peel the finished painting from the tape hinges and reuse the same board with tape in place. I can usually use the same tape for 2-3 paintings. Once it loses it stickiness I throw it away and start fresh.

Hinges also allow the entire paper to be exposed. Taping the corners down leave you with unfinished corners to deal with. Making rolls of tape stuck to the back of the painting might create bumps in the painting. Hinges prevent these problems!


Disclaimer:  This is my preferred method. I know many artists who do things differently and with great success. This is just another way. Some artists like to use long strips of tape to mask their painting and create a clean edge. This is what works for me!

Thursday, April 27, 2017

Pastel Supplies 101: Support Boards

'Back to Iceland'          5x7       plein air pastel         ©Karen Margulis
available $50
 I am counting down to my daughter's wedding. The big day is next week and I have a list of things to do to get ready. I don't know how much painting will get done so I will be sharing some paintings that I haven't yet shared along with some FAQ about pastels supplies.

Today's question comes from C who asks:
I am curious what type of foam board you use to attach your paper to while working in your studio and why do you choose a black color? I notice that your tape is white. Why do you like this tape and what is it?


Using foamcore as a support board
I rarely work on premounted pastel paper so I need something to attach my paper to while I paint....a support board. You can purchase drawing boards made of wood with a built in clip. These are great but I like to leave my paintings on the boards until I am satisfied with the finish. This makes the wood boards too expensive. Instead I prefer to use light weight foamcore boards. Here's my secret:

I get my foam boards at the Dollar Tree. They are decent quality and come in both black and white. The boards are 20x30 which is the perfect size to accommodate my paper and reference materials.


A selection of used foam core boards used for support boards
I use both the back and white boards interchangeably. It depends on what I have available. I do prefer the black boards for plein air because the black cuts down on the glare. Other than that I have no preference. Since the boards are only $1 I use them for many things in the studio. Note that it isn't archival so I don't use it for any framing duties!

  • I store large paintings on a board and stack them against a wall in my studio
  • I make foamcore sandwiches to ship paintings
  •  As protection for framed paintings when transporting them
  •  Cut to size to place in clear bags for painting display.
  •  Make visual aid posters for my workshops
  • I cut and score a piece of foamcore to make a tray to collect dust at my easel
  • I use and reuse the foamcore until it falls apart and then it goes into the recycle bin.
I will address the use of TAPE in my next post. I welcome your questions about pastel supplies!

Today's painting: This is a 5x7 plein air study I painted last summer when I was visiting a dear friend in Iceland.

Wednesday, April 26, 2017

Refining A Demo Painting: Bluebonnets!

'Dancing Through Life'          16x20          pastel         ©Karen Margulis
available $350
Painting in front of a group is always an interesting experience. When I paint a demo I am trying to verbalize what is going through my head as I paint. I have a running dialog with myself when I paint and when I demo I make this dialog public. Often times the demo becomes a learning tool and moves away from being a finished 'good' painting. A demo is often an opportunity to share certain techniques and painting concepts. When this happens, these demo paintings need further contemplation and work to be considered finished.

I've had this unfinished 16x20 demo sitting in my studio for a year now. It was started in my Uart workshop last spring. This morning it called out to be finished. I set it up on my easel and evaluated it. I needed a plan for the finish! Read on below to see what I decided to do to refine and finish the painting.

The original demo painting untouched from the demo easel

  • The unfinished demo had good bones but it was too dark and heavy. It was also too busy and the flowers weren't in the best places. It began life with an alcohol wash underpainting which you can see peeking through in places.
  • I began the refining by brushing off some of the busy marks. I used an old stiff bristle brush. I liked it better as soon as I simplified. It reminds me that is isn't always what you add but rather what you take away!

Brushed and simplified

  • Next I lightened and brightened the sky and the trees. I added more middle value earthy greens to give more definition to the trees.
  •  I also lightened the very distant tree line which was much too dark. This change created a greater illusion of depth.
  • I added more sky holes especially at the base of the trees opening them up.
  • I then sprayed the foreground with workable fixative so that I could get more texture and simplified foliage.
  • Beginning with the distant field I added more greens. I used  lighter cooler and neutral greens in the distance.
  • Finally I addressed the flowers. Bluebonnets are more violet than blue so I added more color to the flowers.
  • I also added hints of flowers in the distance again to create more depth.
  • I refined a few of the focal flowers and added the light bit to the tops of the flowers. I did use a harder blue pastel to add some definition to a few petals.
  • The final step was to add bits of yellow flowers as spices.

closeup view of the bluebonnets

Tuesday, April 25, 2017

How Dark is Dark Enough?

'Late Summer Haze'            8x10        pastel         ©Karen Margulis
available   $125
It really isn't hard to have rich and colorful darks with pastels. Some of my favorite pastel makers offer dark sets and they are a must for my pastel collection. I especially love Terry Ludwig and Diane Townsend darks.  I enjoy starting my paintings by building up several layers of these rich darks. I know that I can modify these dark areas as the painting develops. I have discovered that if the darks aren't there in the beginning it's hard to put them in without have spotty areas of dark.

But how dark do the darks have to be? The question came up during my workshop this past weekend. I had been doing my usual demos showing how I layer dark values at the start of my paintings. The result is usually a block- in with some pretty strong dark passages. See the painting and pastels in the photos  below for a good idea of how dark my paintings usually begin.

starting a painting with rich darks


One of the artists in the group was concerned that perhaps she didn't start her paintings dark enough. She preferred a brighter higher key look to her paintings. It started me thinking. How dark is dark enough? Do we have to use the darkest value available to start a painting? What if you don't really like to use those dark values....what if you prefer to paint in a higher key?

The answer is simple. The darkest value you use in a painting will automatically be the darkest dark. Even if it isn't very dark! 

If you use a middle dark value to a middle value and every other value in the painting is lighter....than that middle value automatically becomes the darkest dark. The value isn't as important as having strong value shapes in the block- in of the painting.


 Take the painting in today's post. It is lighter (higher key) than I usually paint. I blocked in the dark areas with a dark middle value gray violet instead of my usual dark violet. Every other value relates to this gray violet. And because the rest of the painting is made of lighter values the gray violet and the additional rusty pastel became my darkest dark.


*A note about the wonderful Terry Ludwig eggplant pastel: This is a wonderful rich super dark. I like to reserve this beauty for accents rather than use in in the black-in stage.*

Monday, April 24, 2017

Winding Down by Painting Mini Pastels


I had some downtime before my flight home today. Instead of sitting at the airport I accepted the invitation to attend the Monday Open Studio session of the Illinois Prairie Pastel Society. It was fun to visit and paint with my new friends. I could get used to this! Everyone needs a group of friends to paint with! (Are you listening my Art Spirit friends in Atlanta!)

Since I had packed away most of my pastels and supplies I decided to sit and paint some minis. I took a piece of Uart that I used for a quick demo and gave it an alcohol wash and cut it into 2.5x3.5 pieces.


The darkish red paper was perfect for a series of poppy paintings. Since I had a very limited palette I enjoyed keeping things simple. I played with background colors and came up with some fun new ideas that I will try on s larger painting.

It was the perfect way to wind down from a wonderful workshop experience! I'll end this post with a peek at the pastels of one of the artists....definitely drool worthy !


Sunday, April 23, 2017

The Joy of Sharing Pastels


Pastel people are the best! I just finished a three day workshop with the Illinois Prairie Pastel Society and I am so inspired and energized!  I am leaving having made some great friends and memories! This was an amazing group of artists! All 21 worked hard and painted with passion and joy!


This pastel society has just over 50 members but it is very close knit and active group.  They have 5 exhibitions each year and have 2 open studio sessions each week where members get together to paint. What a wonderful thing!


I tried to fit as much as I could into the workshop weekend. It was a big 'tasting' event. We tried several ways to start a painting all with the ultimate goal of loosening up. The photo above shows 5 of my demo paintings all 16x20 and 18x24. 


The workshop space was amazing! We had a separate classroom space and a large area for painting. It was a workshop dream come true!  
I head home on Monday to my next big event....daughter Caitlin's wedding on May 5th! 


Thursday, April 20, 2017

Trying an Oil Stain Underpainting

'Up from the Mist'        5x7       pastel         ©Karen Margulis
available $50

Ahhhh the smell of oil paint and Gamsol filled my studio today. It made it feel like a real art studio somehow. Pastel is an odorless medium and I forget how much I love the smell of paint.  I took the oils out today because I was looking for something different to try. It seems I have stumbled onto a series of wildflowers as I prepare for the IAPS convention. Whenever this happens I have to work it until the fire burns out.

But in order for the series to be interesting I need to change things up. Different papers, different pastels and different underpainting techniques are all things I look to try. Today I decided to do an oil stain underpainting. It has been awhile since I have used this technique but I do love it. Read on for some tips on making the best of this technique.

Tools of the trade

SUPPLIES NEEDED

  •  Paint: a few tubes of oil paint. I only use alizarin crimson, ultramarine blue and cadmium yellow medium and mix the colors I need. I don't use white since I want my colors to be rich and transparent. I don't use black either but mix red and blue for a nice rich dark.
  • Brush: I use a cheap bristle brush because I like to scrub the paint and the sanded papers are hard on a brush!
  • OMS: which stands for odorless mineral spirits. You can use your preferred brand. I use Gamsol or Turpenoid. Do not use the Turpenoid in the green can. In my experience it doesn't dry as well especially if you use it to do a wash with pastels. You will also need a can or jar for the OMS.
  • Paper: You need a pastel paper or board that can get wet. I prefer Uart paper. Ampersand Pastelbords are an excellent choice as well. For today's painting I used Pastelmat which wasn't my favorite choice. I didn't get the drips I usually get with Uart paper. (I will do a Pastelmat review soon)
closeup of the oils stain

I love the vibrancy of the oil paint. It makes a rich and colorful underpainting. The trick is getting the paint the right consistency. I call it an Oil Stain because you want to get the paint the consistency of wood stain. I use the OMS liberally when mixing my paint and make a puddle of color the consistency of stain or tea.  If it is too thick the painting will fill the tooth of the paper and you won't be able to layer much pastel. If it is too wet it will just run and it won't stain the paper.

TIP: If you can see brush marks in the paint then it is too thick....thin it with more OMS. Practice, practice and more practice will allow you to know just how much OMS is enough.

As the paint dries the magic begins. The best underpaintings will result in interesting drips that look like root systems.  The Pastelmat absorbed the paint so quickly that it didn't drip. It was a bit disappointing but I still loved the vibrancy of the oil paint and it gave me something colorful to respond to.


For a more detailed tutorial to a Turpenoid wash underpainting see my pdf demo available in my Etsy shop .https://www.etsy.com/listing/162168002/pastel-painting-lesson-demo-pdf

Wednesday, April 19, 2017

Detail is an Illusion: Painting Detail in a Landscape

'Dreams Come True'           8x10         pastel        ©Karen Margulis
available $165
I decided to put them in at the very end of the painting. I didn't stress over how I would paint something so tiny. I didn't draw them first. I just made a few little marks and called it done. All it took were a few simple marks to give a suggestion of buildings and boats in the distance. My marsh now had the hint of life. But it is just an illusion!

Call it a 'hint' or 'suggestion' of detail. That is the way I like to paint detail in a landscape. I want the painting to have a bit of mystery. I want the viewer to participate and fill in the blanks. I choose not to paint every blade of grass. I choose not to draw precise buildings, trees or other objects.  My goal is to provide just enough information for the viewer to know what I am suggesting.

The marks that suggest detail are quite abstract when viewed in isolation. Look at the close up photos from the marsh painting. When removed from the painting they are just a collection of marks. The detail we see is just an illusion.


Practice restraint the next time you are tempted to put in too much detail in your painting. Try to see how limited you can make your marks. Suggest the detail!

Painting notes: This is another demo done for my recent Texas workshop. It was the artist choice demo and I am always happy to paint the marsh!

Tuesday, April 18, 2017

Fantastic News to Share...and a Story

'Under the Setting Sun'           18x24            pastel       ©Karen Margulis
I am thrilled to share that I just met one of my most personal art goals. My painting 'Under the Setting Sun' was awarded Best of Show in the Southeastern Pastel Society's 2017 Juried exhibition. My thanks goes to Sally Strand who judged the show. I am still in disbelief even though it happened a week ago. I was in Texas and missed the reception. I would have loved to be there because it would have made my story come full circle.

I was recently asked to share how I got started in pastel and this is the perfect time to share that story. It all began with the Southeastern Pastel Society exhibition of 2005.


It's a blue ribbon!
I started taking pastel classes in November of 2004. My kids were in high school and more self sufficient so I decided it was time to get back into some art. After an unsuccessful watercolor class I discovered pastel. I was hooked! My excellent instructor Marsha Savage and a wonderful supportive group made it easy to get hooked!

Soon after starting class I attended the opening of the Southeastern Pastel Society's annual exhibition. I was amazed by the quality and diversity of the pastel paintings in the show. I remember this moment as clearly as if it happened yesterday. I said to myself "I am going to have a painting in this show someday!"

It took a lot of work and a commitment to daily painting but one year later one of my paintings was accepted in the exhibition. It was a conch shell!  (See the post of my acceptance here.) I was beyond thrilled. There was no turning back! I continued to paint and study and work hard at my daily painting commitment (and blog) and I got accepted into the next years show....and the next and the next. In a few years I had achieved Member of Excellence designation which I never even dreamed of! I have not missed an opening reception since that first one 10 years ago.

Except this one. The year I got Best of Show!  It is a special award for me since it was this same show that ignited the spark which continues to burn!

My conch shell.....first painting accepted into an exhibition 2006


Monday, April 17, 2017

The Secret to Success on Canson Paper


'The Secret Garden'             12x16            pastel             ©Karen Margulis
sold
I began my pastel journey with Canson. Like many pastel artists I didn't really know any better. It was the only pastel paper available at our local Michaels hobby store. I wanted to try pastels so I used my coupon to buy some paper and a small set of Rembrandt pastels. I wasn't very successful.

The pastels were hard and scratchy and my paintings  didn't seem as rich and vibrant as the pastel paintings I saw in books. Was it the paper? Was it the pastels? Maybe it was just me?  I needed to get some lessons and knowledge under my belt. And now 10 years later I understand I needed time to mature as an artist and understand my materials. Canson is now my friend. 

So what is the secret to success on Canson Mi-Teintes paper?


It turns out that the secret isn't just one thing. It isn't just the pastels we use,  it is also the techniques we use that make a difference. I was very lucky to have Marsha Hamby Savage as my first teacher. At that time Marsha painted often on Canson. In fact many of the first pastels painting demos I ever saw were Marsha's landscapes on Canson.  The techniques she used then are ones I return to often especially if I am working on Canson. ( I am referring to Canson Mi-Teintes unsanded paper)

Secret #1   Make sure you have a plan for your painting.
Canson paper is unlike sanded papers in that it doesn't take as many layers of pastel. It is easy to fill the tooth of the paper which will lead to dull flat and muddy paintings. If you have a plan then you will not have to experiment on your painting. You will be able to make marks and leave them alone....leading to less layers. For today's painting I did a 4 value thumbnail sketch and a Notan (black and white) These were the blueprints for my painting. I had a plan!


Secret #2 Begin the painting with hard pastels.
This is common advice for pastel paintings. I don't always follow this advice but on Canson I will always begin the painting with a block in using harder pastels. I like to use hard sticks such as Nupastels or polychromos or cretacolors hard pastels. These pastels have more binder so the pigment isn't released as readily. The tooth of the paper isn't filled as quickly. For today's painting I did a value block in with just 5 Nupastels. I blocked in the darks, lights and most intense colors. This is a wonderful way to start any painting!


Secret #3  Use a Light Touch 
The right touch is always a light touch and this is especially true when working on a non sanded surface. Think of the pastel as a feather. If you press too hard it will bend and break. Light strokes will allow for more layers....even with the softest pastels. I began today's painting with hard pastels and a light feather touch. After the initial block in I switched to softer pastels such as Terry Ludwig pastels. As the painting developed and I got to my final layers I used a heavier touch. For example, the flowers were all painted with one layer.....one heavy single mark for each bloom with a soft pastel.

starting to add some softer pastel layers

finished!

close up detail

The secret to success on Canson or any non sanded paper is really a combination of the right pastels and the technique of applying the pastels.....hard to soft, light to heavy, start with a plan....are the three things that I have found to help me not just to tolerate canon but to actually LOVE it!
Explore these techniques further in my PDF demo on Canson available for $6 on etsy.http://etsy.me/1aMpVwU

About the painting:   12 x 16 on burgundy Canson mi-teintes paper, smooth side.
This is a landscape from my trip to Sweden. It  depicts a patch of Monk's weed or Bishop's weed in the shadows. Monk's weed was in bloom everywhere. It is an invasive weed introduced by monks in the Middle Ages. It was used to treat arthritis and gout. It is in the carrot family so the blooms look a lot like Queen Annes Lace which is probably why I love it!

Friday, April 14, 2017

Painting Elephants: Behind the Scenes

'True Love'         11x14       pastel       ©Karen Margulis
sold
 Here is something different for me! I had fun with this commission painting of a pair of elephants. For today's post I will share some of the 'behind the scenes' decisions I made while painting the elephants. I didn't take photos of each stage but I will explain what I was thinking.

The first decision was the paper and underpainting technique. I was given the photo of the elephants which was taken by the collector's friend. She wanted a portrait format 11x14 painting. She didn't have any other requirements (which is how I like to do commissions!) I decided to use Uart paper 500 grit. I toned the paper by layering some grayed colors: violet, green and peach. I blended these layers with pipe insulation foam to create a nice colorful gray. I would use these same pastels in the elephants.

The same pastels were used in both this landscape and the elephants!
  • The next step was to select my pastels for the painting. I was about to start a new tray of pastels when I realized that the colors I used in my last two paintings would actually be perfect for the elephants! So I kept the same tray out and started the painting.
  • I drew the elephants with a piece of Nupastel. I needed to measure to get the eyes in the correct place.
  • Next I blocked in the darkest areas on both elephants. I began with a dark green Nupastel. I squinted at my photo to see where these dark areas were. I wanted to be sure to have green in the elephants since it will be the background color.
  • I decided to do the background before finishing the elephants. Inspired by the reference I chose greens but I simplified the clutter by layering a variety of greens. I tied them all together with some linear marks. These marks provide some interest and energy and also suggest grass.


Finished the background now onto the elephants!

  • Once the background was finished I returned to the elephants and started to build the dark areas with a few layers of some other dark pastels. I used a dark blue and a dark violet and a softer dark green. 


  • I then finished the eyes of the elephants. It is important to get the eyes right. They brought the elephants to life!
  • The rest of the painting was just a matter of layering. I began layering the middle value areas. I selected a variety of grayed colors such a a peach, great and several blues and violets. All of the colors I used were neutrals. I only used a pure gray (black and white) in a few places. I preferred using colorful grays. This is the way I paint cloud shadows so that is why this palette worked for the sky painting and the elephants!


Layering the grays

  • Next it was time to tackle the details. To paint the wrinkles I used a lighter pastel over the dark areas rather than drawing lines. 
  • I did use a dark blue Nupastel and a bit of Terry Ludwig eggplant to reinforce the dark details.
  • The final touch was to add the lightest gray with a very light touch of the pastel. I added a few brighter green grasses and called it done!

Thursday, April 13, 2017

Painting a Moody Sky in a Landscape Painting


'Blue Promise'           9x12          pastel        ©Karen Margulis
available $165
It was a tricky situation. I had planned a lesson on painting the sky for the last day of the workshop. The weather reports supported my plan. ...clear skies until the last day then clouds. But the second day of the workshop gave us an amazing display of clouds against a brilliant blue sky. It was a text book sky. I was tempted to swap lessons and paint the sky for the day 2 demo but decided to take my chances and wait.

I'm glad I waited. A textbook blue sky is great but it is pretty straightforward to paint. I shared some tips on painting a blue sky and puffy white clouds but then moved on to the real challenge.....an overcast moody sky.


Our painting spot....The Salt Lick restaurant
The morning dawned gray and cloudy. Not what I had ordered but we would make the best of it. Secretly I was excited. I would rather paint a moody brooding sky than a perfect sunny blue sky any day!  Have a look at the photos to see the kind of day we had to deal with. The sky was overcast with some rows of gray violet clouds. (hard to see in the photo) The color was subtle but it was there. I saw violets, greens and yellows. And the clouds were changing quickly. I had to work fast!

The finished demo

After talking about creating my own technicolor grays for the clouds I took out a piece of 9x12 Uart paper and began the painting. The story was the sky and not the ground so I lowered the horizon and simplified the foreground. It was important to eliminate the clutter that came before me and the sky. I could see trees in the distance so I hinted at some simple tree and grass shapes and moved onto the sky.


  • I painted quickly by layering violets and yellows using big broad marks with the side of my pastels. 
  • I layered several blues and violets allowing them to slightly blend. 
  • I then added a pale yellow to the horizon to suggest the brightening that was happening.
  •  I added a whisper of blue for hope. 
  • And finally I added a small slash of pale yellow pointing down to the ground. 
  • The clouds were actually lined up across the sky in horizontal bands. I redesigned them to create a directional thrust to the sky leading us down into the painting.


close up of the demo
If you would like more details and tips for painting the sky and clouds please have a look at my PDF demo available in my Esty shop here.