Visit my Patreon Page for more painting instruction and Paint Along Videos!

Friday, June 30, 2017

Friday Fun: Pick Up a Paint Brush


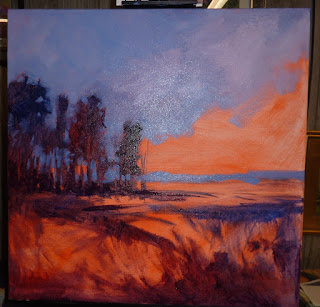
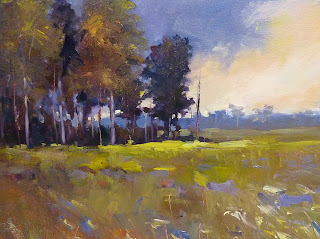
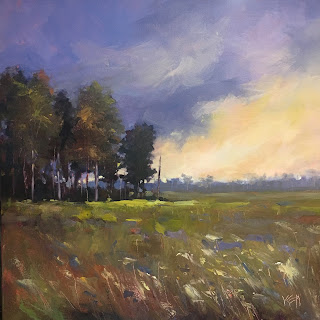
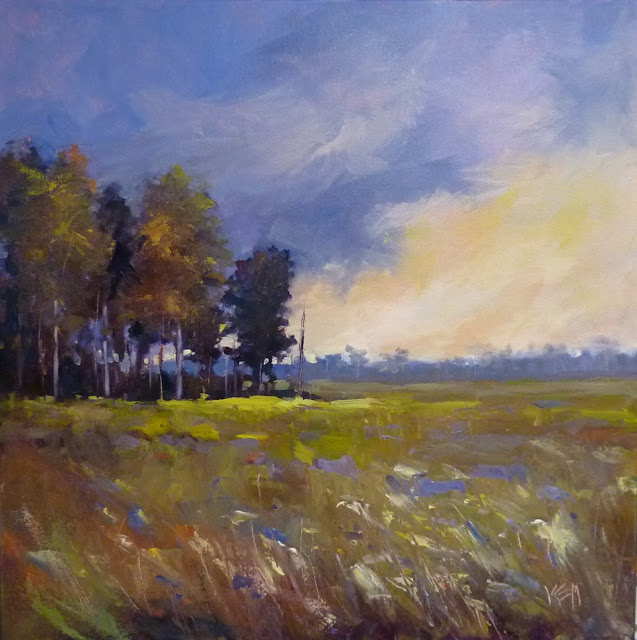
'Moody Marsh'         24x24      acrylic on gallery wrapped canvas
available $400
 I don't really know what got into me last weekend. I got an itch to paint with a brush! Like many artists I have an art store's collection of supplies so I didn't have to go far to find some paint and brushes. I have oil painting supplies, acrylic, gouache, watercolor....I am not lacking art supplies. I decided to take out my acrylic paints and paint something large with a brush!


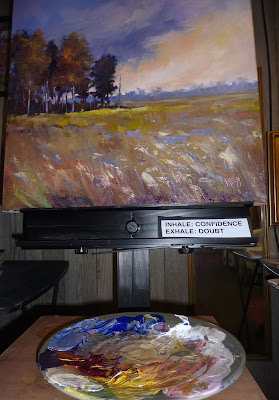
on the easel
I am not experienced with acrylics but I thought it would be fun to experiment. I decided to keep it simple. I used an old pastel painting of mine as the reference. I chose a limited palette of Ultramarine blue, Alizarin crimson, Cadmium yellow and white. The paint I used was Golden Open Acrylics.
I used 2 one inch brushes and an old palette knife.


The start of the painting....toned canvas orange
As I painted I reminded myself to work the same way that I do with pastels....only with a brush. I started the painting the same as a pastel by toning the canvas and blocking in the dark shapes with an interesting dark. ( used red and blue) Thinking of how I painted a pastel helped me!


Mixing paint and making the brush strokes I wanted were the tricky parts. It is a learning curve and if I really want to be more confident and in control I will need to practice more often. Once a year with a paint brush is not enough!

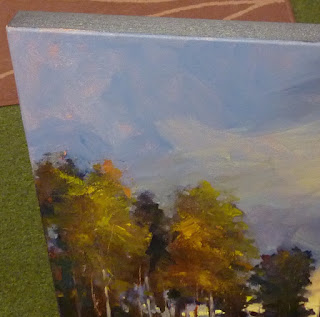
close up of the edges....1.5  inch gallery wrapped canvas

Why Picking up a Paint Brush is a good idea


  • Being comfortable with a brush and developing your own personal brushwork will help you create more successful UNDERPAINTINGS for pastels.
  • Pushing yourself to MIX the colors you want rather than pick up a stick of pastel will give you a better understanding of color. This understanding will transfer into more effective color in your pastel paintings.
  • It pushes you outside of your comfort zone. As long as you take the pressure off and decide to make it fun...being outside your comfort zone is always a good thing for growth.


detail shot


Thursday, June 29, 2017

Pastel FAQ: How Do I Paint the Greens of Summer?


'Counting Sheep'        8x10        pastel         ©Karen Margulis
available $165
The land of green is even greener than usual! We have had plenty of rain in North Georgia and the green in the landscape is at its peak!  I seem to be painting a lot of green paintings perhaps influenced by the time of year. So I have been dealing with the challenge of green.  One of the challenges we have when painting landscapes with an abundance of green is how to make the green more interesting....how do we tame the green?

The key to successful greens is to introduce other colors into the green masses. I like to remind myself of the following....

"If it is green and growing then there needs to be some dirt"   


This reminds me to paint the green stuff by layering 'dirt' colors such as reds, yellows, violets with the green. These colors add interest to the green masses but also bring them to life and make them feel more believable and filled with light. Read on to see how I put this idea into action.


My drawing with a 305 Nupastel on Yi Cai paper
 My scene is a summer meadow in Sweden. It was incredibly green. On first glance the only other color I saw were the white sheep in the distance. If I looked closely though I could see bits of gold and orange peeking through all of the green grass. Perhaps some dried grass or bits of the earth. I know I would have to exaggerate these first colors to add interest to this very green scene.


For my initial underpainting or block in I decided to use Nupastels and rub in with some pipe insulation foam for a soft dry wash. I selected the dark blue spruce 305 for the trees, pale blue and cream for the sky and some wonderful earthy ochre and dull orange for my DIRT.

The first layer rubbed into the paper
Pushing the pastel into the paper for this first layer allows me to build the rest of the painting with several layers of green. I am careful not to cover all of my dirt colors with green!
The painting also needed a little violet dirt. So I used a few muted purples in a few areas of the grass and trees. Click to enlarge the photos to see the violet.


up close and personal
TIP: When painting green in the landscape move beyond the local colors of green and introduce dirt colors....red, pinks, oranges, yellows and violets. These colors can be put down in the underpainting or as you layer and build the masses of green.

I like to think of DIRT when I paint green but I will never forget a lesson I learned from Richard McKinley who tells us the secret of green is orange and violet is the friend.
There is science behind this secret and you can read all about it in Richard's Pastel Pointer column here:http://www.artistsnetwork.com/medium/pastel/painting-greens

Wednesday, June 28, 2017

Painting without a Plan


'Dancing with the Stars'        10x8        pastel       ©Karen Margulis
available $150
 I admit it. I didn't start with a plan. I don't always have a plan even though I stress how important planning is to a successful painting. But I was so excited to start on my daily painting that I didn't take time to make a plan. I just began painting.

I was a few minutes into the painting when I realized that I didn't do any kind of underpainting. I didn't even do my usual value block-in. Once I drew the flowers I just dove right in!

Working on dark gray Yi Cai sanded paper. Click to enlarge to see sparkles

I just started painting the flowers with the local colors. And then I started with the dark foliage again using the local colors of green. What was I doing??!!  I always layer my greens with other colors to make the green more lively. But I was enjoying the painting so I just kept going. Then the phone rang.

The start....without a plan

It was my sister just wanting to chat. I was in the middle of the painting but didn't want to be rude and I really love to chat with my sister. So I put her on speaker and continued to paint. I chatted and painted until I was just about finished with the painting. It was the strangest experience. I almost felt like my hand was on auto pilot as I painted away without stopping. I found myself making marks and choosing colors without actively thinking about what I was doing.


I've created a jungle!  Midway through the painting


After we hung up I made a few refinements and called it finished. It was an oddly satisfying experience to paint without a plan and take a backseat and let things unfold.  I still believe in the power of a plan but every once in awhile it is very liberating to just let go and paint!

Tuesday, June 27, 2017

Instagram Pick of the Week: A Beautiful Interlude

'Summertime Woods'         10x8       pastel       ©Karen Margulis
available $150
Beauty is everywhere but not everyone can see it. Sometimes it is hidden or maybe just subtle. But it is there. It takes the the eyes, heart and soul of the sensitive to see it. And it takes the artist to show it to the world. I love to see the world through the eyes of other artists. Instagram is an easy way to get my daily fix of beautiful art.

Today I would like to introduce you to an artist whose Instagram feed provides me with a beautiful interlude to my day.  Introducing Heidi Hjort.   I met Heidi two years ago when I taught a workshop in Finland. I fell in love with her work and was thrilled to find her on Instagram.
Here is an excerpt from Heidi's website:

"I’m an oil painter from Vaasa, Finland. My art is about Everyday Beauty as I believe that the mundane and the sacred are one and the same. I’m fascinated by the Impermanence of Beauty and how everything is in constant change. It’s an incredible reminder of how short life is and great reason to live each day to the fullest."

 I invite you to visit her website www.heidihjort.com  and her Instagram feed @heidihjort

Below I am sharing an excerpt from my blog post during my workshop in Finland. It brings back some wonderful memories of a special place and time.

Here are a few photos from the summer house in Vaasa. This is our home base. Our host, Annika is absolutely wonderful! She is making us delicious meals and lots of coffee. She even managed to do three beautiful paintings on the first day. Here are some photos of the summer house property.

One of the demos I did in Finland

Here is Heidi painting the birch trees

The beautiful view

The guest cabin and sauna

The sun came out!
Today's painting is my version of the Birch trees. It was done on Uart paper with an alcohol wash. In going through my Finland photos for this post I found several more that are begging to be painted!

Monday, June 26, 2017

Lesson From an Unintentional Underpainting: Weekly Inspiration

'The Quiet Time'         8x10        pastel        ©Karen Margulis
available $145
A interesting thing happened in the studio today. I didn't plan it. But I did embrace it. And what could have been frustrating turned into something joyful. It was time for my daily painting. I didn't really have a plan other than wanting to reuse a piece of paper from my reject pile. I pulled out a nice 8x10 piece of white sanded paper. It had a few blue and gold marks from an old demo. It would be the perfect candidate for an alcohol wash.  But I didn't get the results I expected.

The unintentional underpainting
I should have brushed off the pastel marks before using the alcohol. There was more pastel on the paper than I thought and as soon as the brush with alcohol hit the pastel it turned into a gummy blob.

Note: Alcohol washes work best with thin layers of harder pastels. Soft pastels such as Terry Ludwigs may get thick and pasty. Also....pure colors give more vibrant results.

Not only was my pastel turning into a thick mess, the light pastels I had used made it even more pasty. In a bit of frustration I took the handle of the brush and started drawing into the thick pastel mess. I started to see a marsh emerge! I started to get excited and continued drawing my big shapes with the brush handle.

When the underpainitng was dry I painted the marsh I had envisioned and the texture from the thick pastel and scratch marks worked beautifully in my favor. An important lesson was revealed.


"There's nothing quite as beautiful as the unintentional."
            Lyle Carbajal

Perhaps Bob Ross would call it a Happy Accident. But the lesson was clear. Sometimes things happen that are unexpected. We can either fight it or try to change it to our original plan.....or we can embrace it and let something more beautiful emerge.


Sunday, June 25, 2017

New Sunday Studio Demo: Blending and the Beach

'Sunday Afternoon at the Beach'       9x12      pastel       ©Karen Margulis
available $155
 To blend or not to blend? Since I have been pondering this question this weekend it is only fitting that my Sunday Studio demo address this question. In my informal Facebook Live video I share my thoughts on blending and how you can be a more effective blender.

I demonstrate a beach scene to share some of the ways I use blending in my paintings. I blend sparingly and always with careful thought. Watch the video to learn more and then come on back to read about how I finished the demo painting.

Click this link to watch the video on my YouTube channel

I didn't add the finishing touches to the painting in the video. I like to stop BEFORE I think I am finished so I can make the finishing marks with careful thought.  Below you can see where I stopped on the painting along with my commentary on the finish.

Demo board with my reference photo and color study.

The pastels I used for the demo. Terry Ludwigs (McKinley Landscape set) Diane Townsend Mood for Green and misc. hard pastels for the grasses.

my color study. 4x6

The painting as I left it in the video

  • I refined the sky. I blended it more and added more defined cloud shapes.The finishing mark was the pop of pale turquoise near the horizon leading into the ground.
  • I refined and separated the distant bushes. I add a light cool green to them to push them back into the distance.
  • I refined the grass clumps by adding a rust color. I painted a few pieces of grass in the foreground clumps. I kept the grasses in the distance loose.
  • I refined the sandy path and added a few more shells
  • I added a touch of blue in the distance to suggest the sea.
I hope you have enjoyed the video demo. I will be out of town for a couple of weeks but would love your thoughts on what you would like to see next!

Saturday, June 24, 2017

An Important Lesson for All Artists


The Evolution of a Painting......Losing the Detail One Step at a Time
all available in my etsy shop
I went down into my studio with a plan. I had given myself an assignment for the weekend. I call it Friday Fun. I allow myself to paint for the sake of play and experimentation. There is no pressure to perform or do a 'good' painting. I give myself an assignment....something new to explore. But that is just a rough guide. 

Today I learned an important lesson. Play is important! But it is also good to let go and let the play and experimentation evolve. LISTEN to the voice in your head that is asking you the question 'What if?'

I went into the studio with a plan but the plan quickly changed and I gave myself permission to change direction. 

 My goal was to do paintings that broke my self imposed rule of no blending. I did a couple of these blended paintings but they quickly evolved into paintings with detail. I enjoyed the early stages of the blended paintings. It raised the question "What if I did a painting and just left it in that early state....What if I tried to do a more abstracted landscape?"

The first painting ....it started me wondering What If?

I started down this road to more abstraction in the landscape and below are the results. I am not sure where it will take me but I do know I was filled with this wonderful feeling of excitement and anticipation for the next painting while doing these little studies.  I'm glad I listened and I am glad I played.


The second version has less detail      8x8 pastel    $75
 Below you can see how I tried to add less and less detail in each painting. (top left to bottom right)


"Children smile 400 times a day... adults 15 times. Children laugh 150 times a day... adults 6 times per day. Children play 4-6 hours a day... adults only 20 minutes a day. What's happened?"  Robert Holden

Friday, June 23, 2017

Friday Fun....Let's Break the Rules!

'All Paths Lead to the Sea'             11x14         pastel         ©Karen Margulis
available $195
OK. So it's not really a rule. It's more like a recommendation. It is also a personal preference. But I have always been told NOT to do it. Blending pastels can be a polarizing issue. Should we blend or should we keep our fingers and tools away from the pastels? 

The first workshop I ever took was with Albert Handell. I know...you could say I was baptized by fire.  I was very new to pastel and I will never forget Albert admonishing us..."Touch it Not!"  I learned to let the pastels do the blending and never blend with my fingers or tools.  Over the years I've relaxed and will blend the first layer and occasional a sky or use a finger to soften an edge. But I still never do much more than that.  

It was time to try breaking my own self imposed rule and blend away! By the way there are some very good reasons to avoid too much blending and I will address them in another post. But this weekend let's have some fun and blend our pastels!


Some blending tools...pipe insulation foam, foamcore, viva paper towel, rag
 Today's painting involved a lot of blending. I used my palm and some tools to blend. I began by blending the first layer and softly blended each subsequent layer. I was trying to get a soft and dreamy look to my painting. In tomorrow's post I will show you the tools in more detail. Below you can see the progress shots.

Blocking in the first layer on Canson Mi-Teintes moonstone
 I decided to work on Canson Mi-Teintes paper in the Moonstone color. I knew the unsanded paper would be easier on my fingers than sanded paper. I blocked in the painting with soft pastels (Terry Ludwig) The used a piece of pipe insulation foam to blend in the first layer.

Nicely blended

Next I worked on the sky. I blended it several times to get the sky clam and the clouds wispy.

Start with the sky
As the painting developed I added layers of gold and green rubbing in each layer until I got to the finishing marks. I couldn't resist adding a few grass marks on top of the blended areas. I am going to try another painting that I leave completely blended and see how I like it. It's all about trying new things and having fun!

Almost there!

Finished....then made corrections to the foreground grasses
YOUR TURN!  If you are not usually much of a blender you have permission this weekend to break your rule and blend away!  If you do a lot of blending try NOT blending to see what happens. :)

Thursday, June 22, 2017

Pastel FAQ: How Do I Choose Underpainting Colors?


'Woodland Reverie'          8x10       pastel         ©Karen Margulis
available $195
The fun continues in KEMStudios. It is great to be home with nothing on the agenda other than paint for pure enjoyment. It is a perfect time for experimentation and new discoveries. Today's painting was done on the new Yi Cai sanded pastel paper and it is a good example for today's Pastel FAQ.

How do I choose the colors for an underpainting?  

That is a loaded question and an important one. Underpaintings or block-ins as I sometimes call them set the tone and mood for a painting. Of course the colors we choose for the underpainting will have an effect on the finished painting. Warm colors tend to give a sunny feeling while cool colors tend to promote a moody or cool feeling. That is just a general truth. There is a lot more that goes into choosing underpainting colors.

  • You can either choose colors that serve a purpose such as choosing local colors or choosing colors to promote depth or choosing simple value based underpainting colors.
  • You can choose colors that don't solve a potential problem but are just playful such as choosing bold colors or complementary colors....colors that are designed to promote visual excitement or just lead to wonderful happy accidents.
It is important that we experiment with many different underpainting choices rather than relying on the same color solutions for each painting. The more we do,  the more experiences we have... the sooner our color choices for underpaintings will become intuitive.

How did I decide what colors to use for the underpainting for this painting? I selected colors to serve a purpose rather than playful. I did cover up all of the underpainting because it was designed to serve only as my roadmap.


  • I used color to set up a value map. I chose dark blue for the dark areas of the woods and the shadows in the grass.
  • I used light values for the sky and tree trunks. (aspens) I used light pink for the lightest trunks and light blue for the trunks in shadow.
  • I used bright pink for the areas in the grass that will have flowers. This is to set up the massing of the little flowers.
Scroll down to see the development of the painting. I am using a beige  piece of Yi Cai sanded pastel paper. I used Nupastels and a wash with water. The paper bowed very slightly but flattened out as it dried. Note the interesting texture this paper has.


closeup detail
Note: I am loving the Yi Cai paper. I need to do more wet underpinnings on lighter paper. This one didn't really show up because the paper was a dark-mid value. I really enjoy how the pastels seem to go on like butter. I am able to get both nice thick textured marks as well as fine detail with harder pastels. The experiments will continue.