Visit my Patreon Page for more painting instruction and Paint Along Videos!

Monday, November 30, 2015

The Evolution of Style...What is the Key?

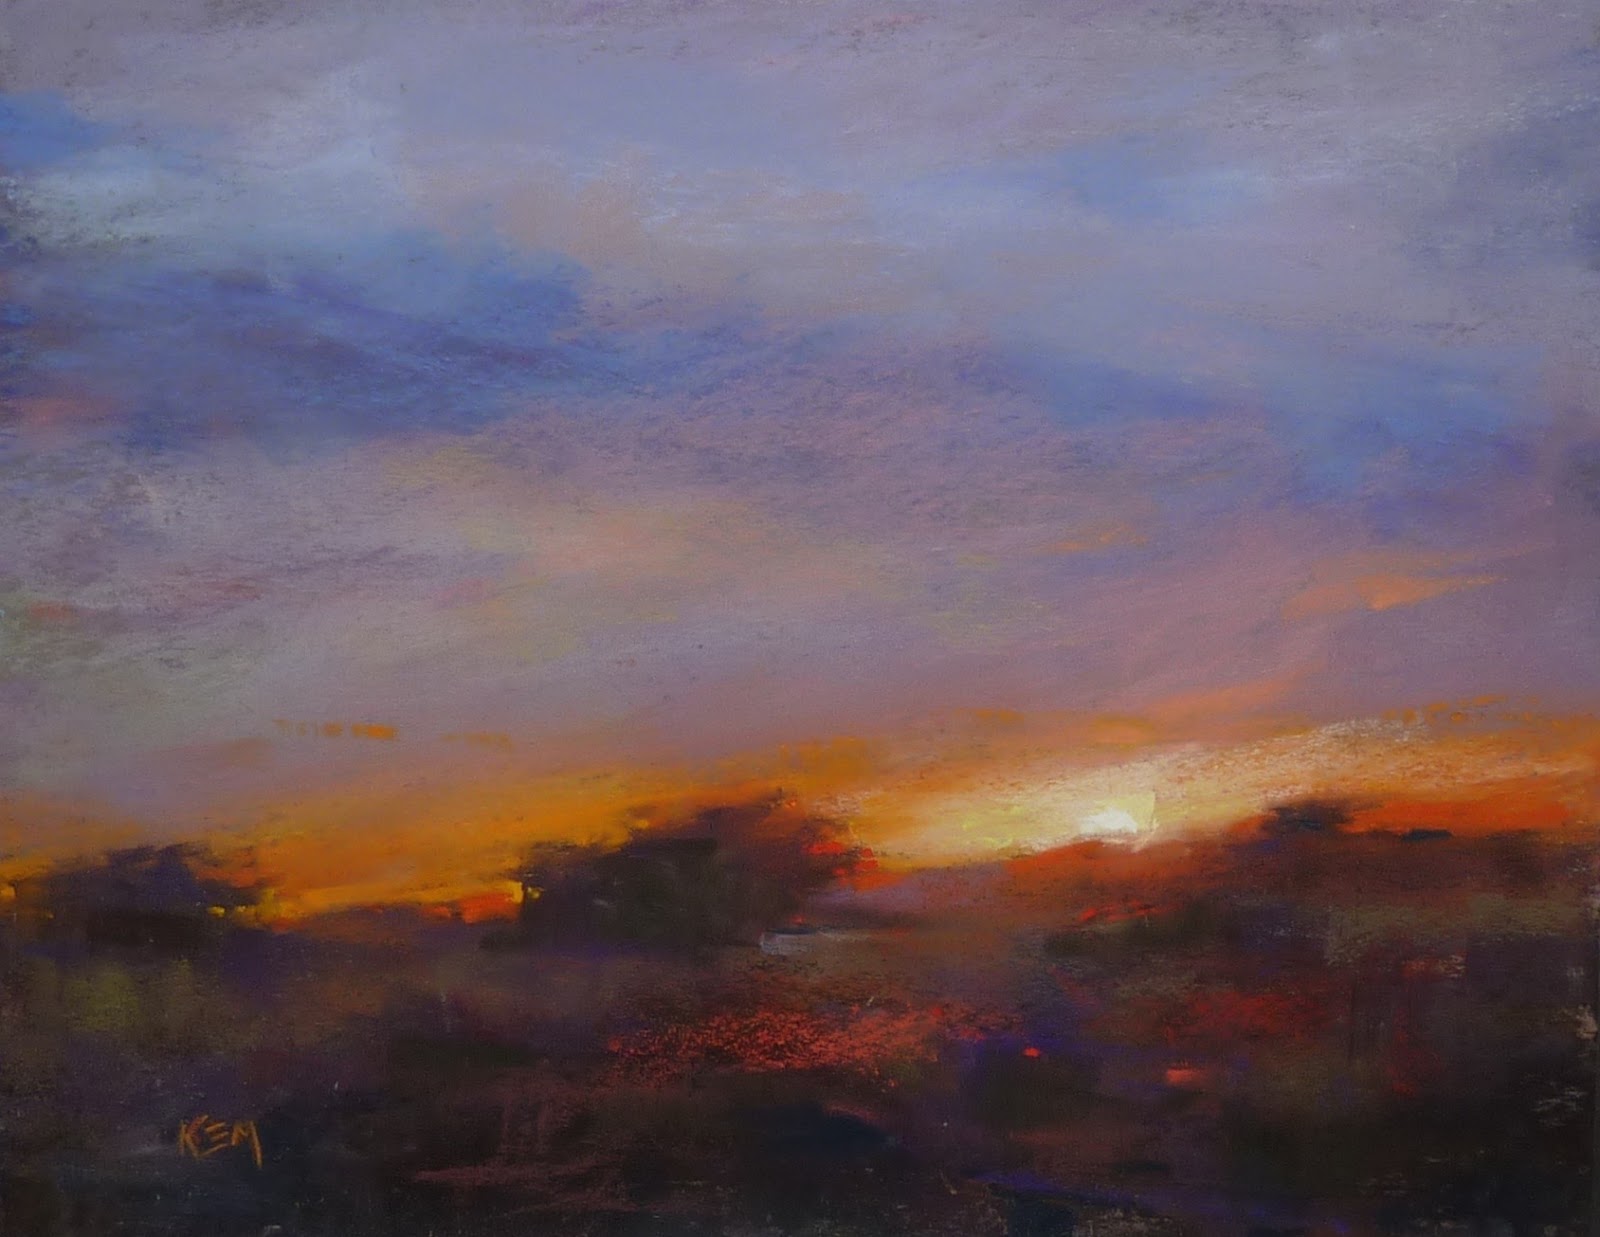
'Beautiful Dreams'           9x12          pastel        ©Karen Margulis
painting available here $155
 An interesting thing is happening. As I sift through my piles and piles of daily paintings I am seeing my painting style emerge right before my eyes. I guess that is one benefit of not throwing a single painting out over the last 11 years. I have physical evidence of my growth as an artist.

Style and originality is something I never really thought much about. I remember reading a quote from Robert Henri who had these wise words:

"Don't worry about your originality. You couldn't get rid of it even if you wanted to. It will stick with you and show up for better or worse in spite of all you or anyone else can do." Robert Henri

So I never worried. I just kept painting. And not only did my style emerge...it went through changes as it evolved. Have a look at today's painting (at the top of the post) and compare it to the ones below.

8x10 pastel from 2009

One of my favorite motifs has been Queen Anne's Lace. It is interesting to see that my treatment of them has changed over the last several years. I began painting wildflowers back in 2009. I chose a low point of view which is a nod to my photography days and the way I would take wildflower photos.  I still paint the flowers from this point of view. I even use similar colors.  But much more has changed as I have evolved.

In looking at all three paintings it is clear to me what has changed the most......my mark making. The way I apply the pastel and how I make my marks has become more restrained and simplified. I have learned to say more with less. I have developed a lighter touch and started to become more aware of the power of edges. Softer marks, harder marks, bold, linear, blended...learning how to finesse my marks has been the key to making my paintings more expressive. Marks matter!

My friend and fantastic artist Barbara Jaenicke has just written a great article on mark making. You can read it on her blog here.


8x10 pastel from 2013
TRY THIS:  Pick one of your favorite subjects and find paintings or photos of paintings of this subject that you have painted over the years. Now paint it again. Compare them and write down your observations. You will learn a lot about yourself by doing this exercise!

Sunday, November 29, 2015

The Power of Marks...Reworking an Older Painting

'Wanderings'            9x12         pastel        ©Karen Margulis
available for purchase $155
I am making a huge mess. But I am having fun doing it.  I have the whole month of December with no trips or classes. My time is my own and I intend to make the most of it. It begins with a major studio clean-up. It is amazing how stuff piles up in nooks and crannies when you are always on the go!  But I am at the tipping point. I have to reorganize so I can paint with more freedom and efficiency.

It is going to be a process and I will share it with you of course! I began the process by having an art sale. I am uncovering studies and demos that need homes. I would rather them be enjoyed rather than sit in a dusty pile. (the 50% off sale ends Monday at midnight. Read about it HERE)

Even though I am trying to clean up I still can't stay away from the pastels! As I uncover older paintings, I see them with a fresh eye and I can't help but want to make some adjustments! Today's painting redo with my comments:


Before the reworking...soft and fuzzy
 This is a  9 x 12 painting on Wallis Belgian Mist paper. It was originally a demo so it was never really finished. On first glance it seemed OK. Not a terrible effort. But it lacked something. It was just a nice scene but it all seemed to soft and mushy.

The painting suffered from its softness. It needed some decisive, confident marks.

For the redo I addressed the following:

  • I refreshed the sky. Using the same colors I made some stronger marks on top of the soft sky already in place. I added wispy cloud marks which gave more air and depth to the sky.
  • I changed the colors and shapes of the trees. I paid closer attention to the negative spaces in the trees and added trunks and sky holes. With just a few marks I was able to create more depth. The trees were no longer big blobs.
  • I like the colors in the field. I added some violet for interest and simply used a heavier touch with the distant peach marks so they would pull they eye back into the distance.
  • The foreground flowers needed a more decisive touch. I decided exactly where I wanted to place the flowers and made a heavier more confident mark. I added a few violet flowers in the shadows. I also used some workable fixative to slightly darken the foreground grasses.


close up detail
What have I learned from this redo?  I like the contrast between the softness and the bolder marks. I like the idea of taking a softer out of focus painting and giving areas more clarity. I know that well placed marks, made with a bolder hand will do the trick. If you are tentative with your marks, it will show. I was too tentative. I have learned that I don't need to fear I will mess up....it is only paper!

Saturday, November 28, 2015

Tips for Painting a Magical Sunset

'Canyon Country Magic'               11x14            pastel          ©Karen Margulis
click here to purchase at 50% off
 Chasing sunsets. One of my favorite pastimes. It isn't something that is easy to do here in North Georgia....land of the hills and trees. Last night looked like the sunset was spectacular from what little I could see through the veil of trees in my backyard. It's frustrating!
 But when I travel I chase the sun!  I especially love visiting wide open spaces such as the Southwest where the sun really puts on a show and you can see it unfold. I have many favorite sunset spots (and photos) from my travels. These sunsets begged to be painted.

I want to paint Magical Sunsets. 

I want my sunset paintings to capture the colors and fleeting drama of the real thing. It is a challenge to turn some pigment and paper into a memory of a magical moment. It is so easy for sunset paintings to turn cliche.  I have figured out some little things that can make a big difference in creating the magic.

Terry Ludwig's 14 piece sunset collection


  • It begins with the right pastels. The best dramatic sunsets are painted with rich and intense color. The best artist grade pastels will do the best job. I also prefer to use soft richly pigmented pastels for the fire of the sunset. I want my marks to be rich and juicy and inexpensive or very hard pastels make it difficult to get the effect I want. I prefer using Terry Ludwig pastels. I used his 14 piece sunset set for the reds and oranges in today's painting. He now has a new sunrise/sunset set that is on my wish list!
  • Don't be afraid to be bold! I will reach for the most intense colors for the warmth of a fiery dramatic sunset. If you are painting a fiery sunset look for intense reds and oranges and yellow-oranges. Save the pale peaches and pinks for the subtle and softer sunsets. Even for the softer sunsets I will often start with a bright fluorescent pink and peach as a base. Remember you can always tone it down! Be bold!
  • Balance bold with dull. If everything is bright and intense nothing will glow so be sure to balance the fire with some ice....use the duller gray blues and violets to suggest the illusion of the light.


  • Watch where the sun places kisses. The glow of sunlight can often be seen on the ground....in the trees, on the edges of shrubs and grasses...whatever the light touches. Show the kiss of warmth with reds and oranges. Paint the glow!
  • The actual ball of sunshine is not necessarily bright yellow. Often we want to paint the sun yellow. This is the shortcut color we use for the local color of the sun. If we really want the sun to glow start by painting the area around it darker....darker yellow-oranges and yellows and end with a pale pale yellow to almost white. Try it both ways and see what a difference this makes!
  • Photographs don't help!  Photos often lie. The colors and exposure are often off especially for a high contrast scene such as a sunset. The ground is often a silhouette....black!  When we paint the ground black or too dark we end up with the typical cliched sunset and not the drama or magic of the real thing. Make adjustments to the painting based upon real life observation. Copying the photo can lead to trouble.


11x14 pastel

These paintings are available in my Esty shop at 50% discount until Monday November 30 at midnight. I have a big selection of original paintings available in my Thank You Sale Event. Use coupon code HOLIDAY50 at checkout. Visit the sale section of my shop HERE

Thank you very much to all of you who have purchased a painting this weekend. I look forward to you seeing them in person!

Friday, November 27, 2015

How I Choose Subjects to Paint


'Taking the Back Roads'          9x12         pastel      ©Karen Margulis
available at 50% off click here for sale paintings
It can be overwhelming sometimes. How to narrow down subject matter and find things to paint? It begins with knowing yourself. Choosing things that interest and excites you is most important. We have to paint what we love.....not what we think others will want or love. So self reflection is in order if you aren't sure what subjects that excite you the most.

For me there is a simple secret to choosing things to paint. I take the back roads. I have learned that it is along the back roads that I find the things that speak loudly to me. If I can find a place away from the hustle and bustle, somewhere close to nature, then I will find my truth. I love to paint the quiet places. The places and things that are often overlooked. There is nothing more exciting to me than a dried patch of weeds! The colors and textures and mystery beg to be painted. All I have to do is slip away to these quiet places and just simply look. Beauty will be found!

'Pink Hush'        11x14       pastel

I have been going through my boxes of paintings this week in preparation for a major studio clean-up. I have uncovered paintings that I haven't had a chance to share. Some of them are just studies. Some are demos. Some were unfinished. I was struck by a common thread though.....the ones I liked the most were those paintings inspired by the back roads! I will keep this in mind the next time I am looking for things to paint!

What do you most like to paint? Where do you find your inspiration? Make time this weekend to gather some reference of your favorite subject!

'Southern Marsh'         11x14      pastel
I am sharing many of these paintings in a special Holiday Art Sale. I want to make art available to all so I am offering a selection of these original pastels for 50% off regular prices. If you make a purchase you will also be entered to win the 8x10 painting below. Sale ends Monday at midnight.

'Gentle Journey'    8x10 pastel
enter to win this painting by purchasing a sale painting 


click here to see sale paintings.
50% off selected paintings in my etsy shop. Use coupon code HOLIDAY50 at checkout

Thursday, November 26, 2015

The Gift of Art..a Sale with a Fun Twist


'Gentle Journey'              8x10           pastel           ©Karen Margulis
enter to win this painting. details below
The touch of a loved one. A kiss from a favorite pet. The sight of a beautiful place. There is not much else to compare to the sights, sounds, smells of your happy place. These things soothe the soul. I rank art right up at the top of my list of things that soothe my soul. Making art and looking at art.

I have a few pieces of original art in my home. Paintings from favorite artists that I have collected or traded when the opportunity arose. These paintings are treasures. I never tire of looking at them. I always seem to see something new when I glance at them. I learn from them and they make me smile.


This year I would like to make the gift of art more affordable. Since I am not affiliated with any galleries I am able to set my own prices and while it is sometimes frowned upon in the art world I am going to have a sale!  But a sale with a fun twist.

I have put together a collection of my original paintings of all sizes and I will be offering them at 50% off regular price. The sale prices will be available until midnight on Monday NOVEMBER 30. 

HOW: Visit my Etsy shop Holiday Sale section CLICK HERE FOR SALE  Use the coupon code HOLIDAY50 at checkout to receive the discounted price.

BONUS TWIST:  Everyone who makes a purchase during the sale will be entered into a drawing to win the  8x10 original marsh painting at the top of today's post. Winner will be selected and notified by email next week.


I would love for these paintings to have good homes and spread joy. Thank you for having a look and for taking time to read my blog!

Wednesday, November 25, 2015

10 Things for an Artist to Be Thankful For Today

'Thankful'           18x24       pastel       ©Karen Margulis
click here to purchase $350
I have much to be thankful for. Family, good friends, good health and much more.   Being a full time artist has provided me with a whole new set of things to be thankful for.  I'd like to share 10 of them with you.
  1. The gift of sensitivity.  I am grateful for the ability to look at the world in a different way. As I have developed as an artist so has my eye and sensitivity to subtle beauty.  I not only notice the obvious beauty like a fiery sunset, but I notice the simple things like a shaft of warm light across a meadow.
  2. My artist friends.  I love all of my friends but there is a special bond I share with my fellow artists. We just see things in a different way. Many of my artists friends were the 'different' ones in their family so when we get together and share so many things in common it is a great feeling. I love my artist friends!
  3. Art Supplies!  We love them and we need them to create. We probably don't need as many supplies as we crave (cavemen made art with burnt sticks)  But part of the fun of creating art is to try new supplies.  And who can resist a new box of gorgeous pastels!
  4. Travel.  I have always had wanderlust but being an artist gives me opportunities to travel. Trips to conventions, workshops and art events take me to new places to discover.  I am grateful for my good friends who love to travel and for the trips we take together. I am also thankful for the opportunity to travel and share the wonderful world of pastels with new friends around the world!
  5. Collectors.  I approach my art by painting the subjects that I love but when a painting connects with someone and they are moved to have it hang in their home....there is no greater feeling of satisfaction. I am grateful for the people who enjoy my work.
  6. The internet.  Even though artists struggle with balancing time online with painting time, I am grateful for the ability to connect with so many artists and art lovers online.  Being an artist can often be a lonely endeavor and having an online community to share work and ideas has been invaluable to me. Being active on social media has led to many connections and new friendships! 
  7. Enjoying my Day Job.  I am grateful for being able to work as an artist full time. I wake up every morning with a spark of excitement for the day. I can't wait to go down into the studio and go to work every day!
  8. Magic.  I am grateful for the chance to create something from nothing. It may not always be a success but just having the opportunity to turn a blank canvas into something.
  9. Books.  I love books, especially art books.  Being an artist gives me a good excuse to collect books. I need them. I need them for instruction and for inspiration. I think I'll buy a new book today!
  10. Sharing. I love to learn so I am grateful for the opportunities to learn from other artists but I learn just as much from sharing what i've learned with others. I love teaching and sharing on my blog and I appreciate all of you who visit every day to see what I have to share!

I wish you all a very Happy Thanksgiving!


SNEAK PEEK FOR EARLY SHOPPERS!
Just in case you want to get a head start on your holiday shopping.....
I am thankful for my blog readers and all of those who have purchased a painting or a lesson or perhaps attended one of my classes. To show my appreciation I am offering the opportunity to choose one of my paintings at a 50% discount. An original work of art is a special gift for someone special (including yourself!)  Visit my Etsy shop and any painting in the Holiday Sale Shop Section is 50% off with coupon code HOLIDAY50   Here is the direct link.

Tuesday, November 24, 2015

To Print or Not to Print


'Fall Splendor II'         12x12     lithograph       ©Karen Margulis
available $45
Every once in awhile I get the print questions. Do I offer prints of my work? How do you suggest making prints or where should we get them made?  This is one area that I confess ignorance. I have never been interested in learning the ins and outs of getting prints made. I guess when it comes down to it I'd rather be painting. When you paint every day you are producing quite an inventory of originals. I could never imagine adding to this with prints. It just isn't something I choose to do.

But I am not at all against having prints made of my work. I just choose not to do it myself!  I do have work available through a few commercial print companies. They provide prints to retail, hospitality, interior design, etc. It has been fun to work with these companies because I never know where my work might be placed. (once in a movie!) In case you are wondering how I got involved with them....they discovered my work online and contacted me.

I am very particular with the companies I work with. I want to be sure the prints are quality and true to color. One company sent me prints for my personal use. I just uncovered them on a shelf and thought I would share them here and in my etsy shop. The prints are 12x12 lithographs. They were commissioned to be a pair of autumn trees. I have the originals and can vouch for the quality of the prints!  


original pastel  6x6   $75
original pastel 6x6    $75

Do you want to learn more about getting prints of your work made? I discovered a wonderful resource that should answer all of our questions! Have a look at Cory Huff's wonderful website The Abundant Artist. I did a search for 'prints' and found a wealth of information on the ins and outs of prints and print on demand for artists. Here is the link: http://theabundantartist.com/?s=print

'Fall Splendor I'         12x12      lithograph       $45


Monday, November 23, 2015

Yet Another Underpainting Experiment


'Hanging On'            7x7              pastel         ©Karen Margulis
sold
The best laid plans go astray when inspiration strikes. I am often asked how I come up with ideas for daily blog posts. It is easy when you have great blog readers who are a constant source of inspiration! One painting will often lead to another painting idea. Or a reader will ask a equation or make a comment that gets my wheels turning. The black underpainting idea has taken a life of it's own and so I feel I need to explore it while my interest is there.

It began with doing a black sharpie marker notan on my pastel paper. A reader comment led me to try a more archival technique and so I tried black pastel. I liked both and so I tried to think of other ways I could get an archival black underpainting. Readers suggested inks. I could try ink or thinned acrylic, gouache, oil and even watercolor. (and I will!)  But I have another product that I decided to try first.


Read more about Art Graf HERE 
Last month I started experimenting with Art Graf pigment blocks for toning paper. These crayon-like blocks of pigment are like tailor's chalk. But they are water soluble. A little bit of pigment, when wet with a brush, goes a long way.

I decided to try the black Art Graf block to block in my painting. I used it to lightly block in the dark areas of my design.

Art Graf applied lightly with a start to wetting it down with water

I then used a brush and water to liquify the pigment. I like how I was able to get some strong dark areas along with some softer drippy areas. When the underpainting was dry, the black areas were fixed into place. It would be a good base for my pastel. It did not fill the tooth of my Uart sanded pastel paper.

Liquified pigment with a brush 

I used the underpainting as a roadmap. I began with the dark areas and added some purples, greens and orange dark value pastels. The camera flash makes the photo below lighter than it really was.


Adding the darks

Next I added the light pastels in the sky. I used these lighter sky colors to start carving the shapes of the autumn trees.

Time for the lights!

The roadmap of values was a big help. It helped me keep my values close together. I avoided having too many different spots of light and dark. The underpainting helped me keep it all together. Starting with two values has been fun and so simple!  And thanks to my readers I have even more ideas to try!


Sunday, November 22, 2015

Using a Notan as an Underpainting...Another Technique to Try

'Twilight's Last'              8x10           pastel          ©Karen Margulis
sold
If I can make it simple I am happy. This week I seem drawn to moody landscapes so my simple underpainitng discovery is coming in handy. I am drawn to the contrast between the light of the sky at dusk and the darkness of the landforms. I need to be sure that I capture this contrast in my painting. 

A Notan is a simplified design using just black and white....dark and light. Using a notan is the perfect way to start a painting that needs to have a strong contrast of dark and light.

Earlier this week I posted a painting done with a notan underpainting. (see it here) I used large sharpie black marker to make the notan right on my pastel paper. It worked well and I was excited. 

But then someone asked me if the sharpie was acid free and archival. I had not considered that actually so I did a little research on the Sharpie website and while some of the pens are listed as acid free......the magnum sharpie was not. So if this is a concern for you please be aware. I decided to try another similar but archival technique.

A simple underpainitng of dark and light

I took out a black pastel! I rarely use black pastel but I do have them laying around. Black can look lifeless in a painting especially if used in large amounts though I do think it can be exciting if used well. I decided that I would use the black pastel to block in the dark shapes in my painting. I used a piece of gray canson mi-teintes paper. I left the paper untouched in the light areas.

The beauty of the sharpie marker was that it didn't mix and contaminate the additional pastel layers. I needed to make sure my black pastel wouldn't mix and make the other colors dirty. So I rubbed the black pastel into the paper with a piece of pipe insulation foam and them I sprayed it with workable fixative. I used Blair low odor spray.

Now my black underpainting was fixed and I was ready to develop the painting.


I began by reinforcing the dark areas. Again, the light and dark notan allowed me to keep my darks dark enough and my lights light enough.  I used several colors in the dark areas keeping the values close together. I then moved onto the lightest area of the painting, the sky.  From there it was just a matter of subtle shifts of color and playing with marks until I was satisfied.

This technique worked great so now I am happy to have an archival way to create a simple notan underpainting!

close up detail
Keep your underpainting questions coming! I am working on something fun and I need your help....I welcome any and all questions having to do with underpaintings. Karenmargulis@gmail.com


Saturday, November 21, 2015

What 11 years of Daily Painting Has Taught Me

'Return to Sanibel Island'          8x10       pastel       ©Karen Margulis
purchase $145
 I didn't think it was too bad. In fact I thought it was a good effort. I remember having fun and that  was the most important thing. Painting everyday had quickly become a habit and my preferred subjects were anything related to the beach. Sanibel Island and Wildwood New Jersey were my favorite places to paint. I had been painting for about 8 months when I painted the Sanibel landscape below. It was time  to revisit this scene to see what 11 years of painting had taught me. It was an enlightening exercise. (the redo is the painting at the top of the post)

The original painting done in 2005

Daily Practice has paid off!  I have learned a lot about what makes a good painting....composition, value, color theory, pastel techniques. I have learned about creating the illusion of depth. I have learned to be sensitive to color and light.  Much of what I learned was from books and other artists. We all can gather information and study.......but the true key to growth is putting this information to work.  It takes practice and many many paintings and using this knowledge in order for our paintings to improve and show growth.

I still have a lot more to learn. Maybe I will try this scene again in 10 more years. Actually I think I will revisit it every November!  Below I will break down the things I learned and changed in the remaking of the painting:


  • I have learned that I don't need to copy the reference photo. In fact I never copy a photo anymore. I use it to start the painting but I quickly stop looking at it. It becomes more important to make the painting work and not worrying about being true to the photo. In the older painting I was still very much in the early stage of learning to paint and being very literal to my photos. I copied what I saw rather than make better choices. In the revised version I added more palm trees, changed the direction of the path and changed the shapes and layering of the distant bushes.....all done to create a better composition.
  • I have learned how to create a better sense of depth in a landscape using the principles of aerial perspective. In the older painting I tried to make the distant trees cooler but they are too blue and not believable. They are also all the same color and value and the shapes don't overlap. In the revised painting I used cooler and neutral and lighter greens for the distant trees. I also changed the way the shapes overlap creating more depth. I also changed the colors and marks from the foreground into the background....all designed to give the illusion of depth.
  • I have learned how to create better pathways. The path in the old painting appears to go uphill. I changed the direction of the path and made it get thinner and flatter in the revised painting. I also changed the colors from front to back....all designed to make the path look like it is going back instead of up in the air.
  • I have learned to do better sky holes! This has taken much practice and restraint. I have learned to slow down and pay attention to the negative spaces in trees and other elements of the landscape. These subtle refinements make all the difference in the final painting.

my underpainting on gray canson mi-teintes paper


Friday, November 20, 2015

How to Use a Notan in an Unexpected Way


'Magic in the Air'             9x12           pastel         ©Karen Margulis
purchase here $150
It's a powerful tool that we all should embrace. Thumbnail sketches done before painting is one of the easiest things we can do to improve our work. Thumbnails help us simplify our subject. They help us create a stronger design. They help us establish a framework of values. The details should come later. We need to frame up the house before we can put up the walls and decorate!

Usually I like doing simple four value thumbnails for my landscape paintings. The 4 value thumbnail is based on the idea that most landscapes can be simplified into four values ...light, dark and two middle values. (John Carlson... Carlson's Guide to Landscape Painting)

Notans are even more simplified. A Notan is a thumbnail or study containing only two values. Dark  and Light. Black and white. It is a simplified massing of shapes and value. To create a notan we have to decide whether the shapes in our scene are mostly dark or mostly light. The middle values are shifted to either black or white. Deborah Paris has written a wonderful article about Notan. Read it here. 

I decided to try doing some notans . A black Sharpie marker would be the perfect tool.  I chose the Magnum Sharpie which has a big chiseled tip to help me create big simple black shapes.


my notan created with sharpie black markers

The Magnum Sharpie worked great for my little notan thumbnail. I used a 4x6 index card for the notan. I used a regular sharpie to draw in a few of the thinner tree shapes. I liked doing the notan. It made it easy to see the shapes. I could see if I had interesting shapes and arrangement of dark and light. It was also quick to do....no thumbnail excuses!

But then I put in my "what if" hat.  What if I used the Sharpie and created the notan right on my pastel paper? I have not had the pleasure of watching Tony Allain paint but friends have told me he will sometimes use sharpie markers to start a painting. What a great idea! I could use the sharpie to mass in my big dark shapes. I was curious to see how it would work as an underpainting for a landscape.


I selected a piece of gray Canson Mi-Teinte paper for my painting. The sharpie marker worked well on the paper and I was able to block in the dark shapes of the trees and the dark shape leading through the meadow. I also used the thin sharpie to draw some of the tree branches.  I now had a nice value map to follow.

It was simple to reinforce the dark areas with pastels that were close in value to the black shapes. I could easily see if a pastel was too light when placed on top of the black marker shapes. It helped me keep my dark shapes strong which was important in order to create the illusion of the glow of the setting sun.


Sometimes it seems like we have too many choices when starting a painting. Using a notan and then actually recreating the same notan with marker as an underpainting is an unexpected but simple way to give a painting a strong start!

Can you help?  I am putting together a new program this year and need your questions about underpaintings. If you have any questions about anything to do with underpaintings send them to me at karenmargulis@gmail.com. I appreciate your input!


Thursday, November 19, 2015

What Were You Thinking?!! Inside a Painter's Mind

'Deeply into the Meadow'          16x20          pastel         ©Karen Margulis
available  $250
Did you ever wonder what on earth goes on inside the mind of the artist as they paint?  What does an artist think about? How do they decide what colors to use and what marks to make? Do they have some kind of inner dialog? What do they talk about in there??

When I paint I usually have some kind of inner dialog. I talk through my decisions and choices especially at the start and finish of a painting. Often in the middle stages I can loose track of my thoughts and work more intuitively.....IF I have planned well and know my direction.

Today I thought it would be fun to share my thought process for this painting. I want to share with you what in the world I was thinking!  I hope you enjoy my inner dialog.

plans for the painting 
This painting was a demo done for my recent workshop in Beatrice Nebraska. The demo was to show how I do a watercolor underpainting for a pastel.  Before I left for the workshop I prepared for the demo by making a plan for the painting. Here is what I thought about for the planning stage:

  • I chose my reference photo to suit the technique I wanted to share. I know that a drippy and serendipitous  watercolor underpainting would suit the subject which was a tangle of weeds and wildflowers.
  • I did a quick black and white value thumbnail with markers. I used 4 values to simplify the subject and create a strong base for the painting. The dark shape is invented to suggest a pathway into the painting and to provide something for the flowers to hang onto.
  • I selected my color palette. I actually cheated sort of.....I wanted to pack as lightly as possible so I planned to have all of my demos utilize the same limited palette. This scene was easily adapted to this palette of colors. To make sure it would work I did a small color study. I liked the results so my plan was in place.
  • I also prepared the paper for the demo and packed my watercolors and brushes. I chose white paper (pastel premiere) to exploit the transparency of the watercolor. 


small color study......2.5 x 3.5 inches    $35

quick black and white thumbnail
 The actual painting went quickly because of the time and thought I put into the plan. It allowed me to verbalize out loud my thoughts as the painting developed. I don't have progress shots but I will share some of the key things that I thought about as I painted.

  • I used Cretacolor Aqua Briques for the underpainting. I knew I wanted to make the underpainting as dark, rich and vibrant as I possible could so I began with painting in the dark shapes.
  • My goal was to preserve as much of the watercolor as possible so I approached the painting with a very light touch. I built up the dark areas first.
  • In many areas I preserved the watercolor by whispering pastel in the same color and value as the underpainitng. The sky is an example. If you look closely there is only a thin layer of blue pastel over a blue watercolor underpainting. 
  • The placement of the flowers.....I put the largest flowers in place in the initial drawing and underpainting. But many of the smaller flower shapes are added as the painting develops. I don't really plan them rather I 'feel' them. I place them where I think they will best fit the flow and movement of the eye. I trust my intuition. (sometimes I am wrong and then I brush out and try again)
  • Color...I was working with a limited palette that I had to make work. I only thought about keeping the values in the right place and not breaking up the value masses too much. The limited palette is actually quite liberating. I am able to play with marks rather than worry about color. I used both light marks and heavy marks to add variety and interest.
  • I wanted to move the limited color around so I decided to add some blue marks to the flowers thus connecting the blue of the sky into the meadow. 

adding a spot of blue 

interesting texture created by a change in mark making

Allowing the watercolor to show
So that's what I was thinking about! What do you think about when you paint?