I needed a little sunshine today. After painting snow for the last few weeks it was time for a landscape filled with sunshine. There is no better way to showcase the sunlight than with the addition of shadows! With that thought in mind I made a plan for today's painting. I'm taking you behind the scenes and inside my head as I share the thoughts behind the making of this painting.
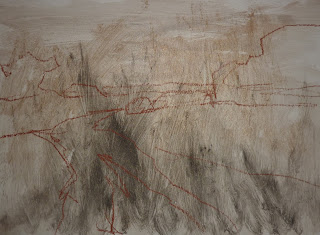 |
| a home made board with some fun texture |
I had leftover clear gesso and pumice concoction. I am working on a big painting and added texture this morning with the gesso and pumice powder. I didn't want to waste my concoction so I covered a piece of mat board with the leftovers. I added some gold Schminke powder just to see what would happen but I think I was too stingy with it and it didn't do much of anything.
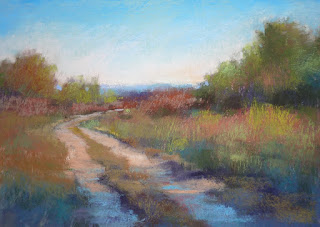
After the board dried I drew my scene with a piece of Nupastel. I was drawn to this scene because of the wonderful light on the grasses and bushes. It would be a fun challenge to paint the shadows so the sunlit areas would be the star.
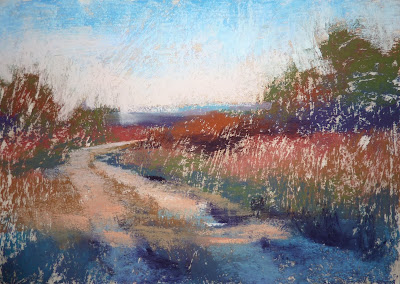 |
| Blocking in the big shapes with mostly warm and cool colors |
Next I blocked in the big shapes with one layer of color. I selected warm colors for the sunlit areas and cool colors for the shadows. You can see the ridges of the ground created by my brushstrokes. I didn't want the white of the board to be a distraction so I rubbed in this first layer with a piece of pipe insulation foam.
 |
| Rubbing in the first layer |
Now I was left with a soft out of focus landscape. It was just a matter of adding detail and clarity where I wanted it. I began by reinforcing the colors in each shape.The texture of the board created an instant suggestion of grass and foliage. It also made it easy to keep my shapes simple.
 |
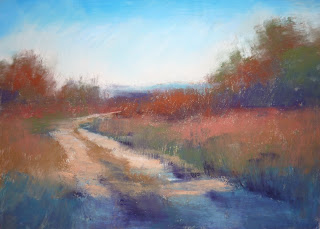
| Reinforcing the big shapes |
It was now time to layer the colors in the trees and grasses. I reminded myself to use cooler blues and greens in the shadows and warmer oranges and yellows in the sunlit areas. I gradually added warmer and brighter colors in the sunlit grasses until I felt like they were sunny enough.
 |
| Ready for the details |
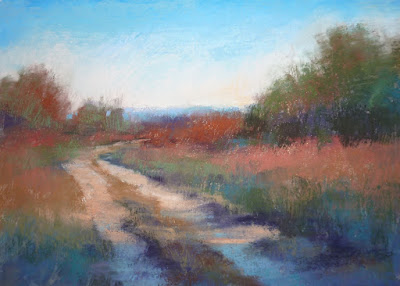
Once all the colors were in place it was time for the smaller details. The texture already suggested grass so I only needed to put in a few pieces of grass and hints of flowers. I also reinforced the light and shadows on the pathway.
 |
| Not quite satisfied |
With the addition of a few bright green spices I called the painting finished. I took a photo and was getting ready to upload it to the blog when I realized the blue shadows on the path were not quite right. They were too light and bright. It didn't look like shade. So it went back to the easel for a correction! It was an enjoyable afternoon immersed in the sunshine! What's on your easel today?
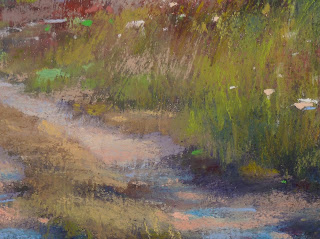 |
| close up of the texture |


4 comments:
I love this painting! It reminds me of the many walks I have taken with my father. As for what is on my easel, I am working on a pastel of a cardinal for a neighbor!
I love the rich dappled shapes of your shadows. The article's great and seeing your process is always fascinating. Gold powder in the gesso not shimmering wasn't a surprise to me. I used a metallic gold base on a painting that I covered with clear Colourfix primer and found out my shining metallic gold turned into a flat yellow ochre through the primer. I think the acrylic base cancels out the metallic effect, does something to the light and the specks of mica that create it. I had to wash over the primer with metallic gold watercolor, though that worked beautifully and did give the painting a good metallic gold background.
Of course I could get the same effect with metallic pastels afterward, but if I'd planned it that way I'd have used more of a rust or russet color under it than the yellow ochre.
I love your paintings. It would help immensely, however, if I were to see your original photos so I can see why you painted it the way you did.
Thank you Scarlett! I don't usually post my reference photos because they have been printed out very small and I am not able to find the digital copy in my collection of 50,000 photos. It would take too long to do a blog post if I had to search for the photo. I wish I could be better organized! Thanks for reading my blog!
Post a Comment