Visit my Patreon Page for more painting instruction and Paint Along Videos!
Showing posts with label pdf demo. Show all posts

Friday, September 23, 2016

A Small Step to Better Paintings


'Aspen Study'        2.5 x 3.5        pastel       ©Karen Margulis


No time to paint? It can be frustrating. We are told that in order to become better artists we need to paint miles of canvas. To get past the learning curve or get to the next level in our work we need to paint more often.....and more paintings!  The more 'starts' we have the more we learn. So what can we do when our painting time is limited?

Take a small step by painting smaller!
When I was working full time and wanting to take advantage of my very limited time at the easel I painted small. I would try to do a daily 5x7 study every day during my lunch break. Little paintings with a time limit taught me so much and contributed to my growth as a painter. But we can get similar results with even less time by painting mini pastels.


2.5 x 3. 5 inch mini pastel
I save all of my paper scraps and cut them into artist trading card size 2.5 x 3.5 inches. Frames and mats are readily available but I often paint minis just to learn....practice. I don't even need to be at an easel. All I need is a table and a box of pastels. I often paint minis when I am trying to practice a new idea or concept. This week I painted several minis with my new Terry Ludwig Stunning Yellow set. It allowed me to get to know the colors without using a lot of paper. I ended up with several studies for future paintings....and I contributed a few inches to my miles of canvas!

Why not paint some minis this weekend? I have a $5 PDF demo which shows a simple way to paint a small landscape.

 How To Paint a Mini Pastel PDF Demo available on Etsy click here


3.5 x 2.5  pastel


Sunday, August 14, 2016

Sky Painting Tip #5 Adding Sparkle to your Clouds

'The Evolution of the Clouds'         9x12        pastel        ©Karen Margulis
available $155
It was one of those so called happy accidents. I didn't do it on purpose and when it happened I thought about changing it. After all it wasn't in my plan. But I decided to embrace it and it opened a door to something exciting! Lesson learned.

I was choosing pastels to use for my clouds. I picked out some darks for the shadows, some middle values and finally some lights for the illuminated part of the clouds. I don't usually pay too much attention to the exact color. I am more interested in getting the value I need. So I was hunting for a very light value green....almost white. I was excited to find just the right piece of pastel....until I made a mark.

It sparkled!  It shimmered! It was glittery and shiny! It was a Great American Pearlescent green pastel and a piece somehow made it into my big pastel box. 

I made another mark. And another. I started to like the resulting shimmer in my clouds. It was an accident but I was happy! I now have a new use for all of those pearlescent pastels I've collected....cloud sparkle!


close up of clouds. click to enlarge. Sparkle doesn't translate well in the photo.

I hope you have enjoyed the sky tips I have shared this week. If you would like more tips consider my Sky and Cloud demo booklet on Etsy. It has the step by step demo for today's painting along with much more. It is like a mini workshop pdf. Thank you to all of you who have already purchased it!

Sample pages


Testimonials:
"The detail in this PDF is incredible and then the video to watch as well is really excellent teaching.Thanks so much."

 "Karen always gives you your money's worth! instructions are easy to understand, photos very helpful, very detailed"

Tuesday, August 09, 2016

Are Clouds Always Colorful?

'Summertime Sky'        9x12         pastel         ©Karen Margulis
available $155
It was a great question. A Facebook friend asked me about painting what she called "fluffy white clouds without much color."  The question really made me think. My first response was that it was really a matter of how we interpret the clouds. We all see color differently. Each person experiences color in a personal way.  I happen to see a lot of color in clouds but I also choose to exagerrate the color as part of my process. Adding color where it may not be quite so obvious for the sake of expression is something I love to do. So in my world clouds are not white and gray. 

But I  couldn't get the question out of my mind. I wanted to give a better answer. Then it hit me! I tend to paint colorful clouds because I choose to paint the clouds of early morning and late afternoon
  • When the sun is lower in the sky the light is warmer anything white tends to be more colorful...think yellows, pink and peach.  
  • When the sun is directly overhead at midday the light is cooler  the clouds appear much brighter and whiter. I rarely paint a landscape with midday light so my clouds are rarely so 'white'. 
  • TIP: All cumulus 'fluffy puffy' clouds have areas of light and shadow. This is what gives them shape and volume. Even when the light of clouds appear bright and white, the shadows can still be made of colorful grays. Even the 'white' can be a very very light value color rather than pure white and it will still look white especially next to a deep blue sky. (I used a pale value yellow for today's clouds)


So a  better answer is:  Know what time of day you are painting. It affects the color and temperature of the light. Clouds around midday will appear cooler and whiter. Any other time of day the 'white' will tend to be more colorful. 

Today's painting is a rare (for me) mid day landscape. We came across these wonderful clouds just after lunch on summer day in New Mexico. I used the lightest pastel I have to paint the sunlit part of the clouds with a touch of pure white for the highlights. The shadows are blends of gray violets.


9x12 white Canson Mi-Teintes paper step one

First layer pushed into paper 

Darks first

building up the ground and cloud shadows

Finish #1. Then more work done to shape the clouds
Intrigued by clouds? Have a look at my new PDF booklet with more tips! click here

Monday, August 08, 2016

Sky Painting Tip #1 The Arrangement of Clouds

'The View from the Marsh'        9x12       pastel      ©Karen Margulis
available $155
It is Sky Week here in my studio. I am gearing up for next week's workshop on painting skies so you could say that my head is in the clouds! I am also celebrating the release of my latest pdf demo booklet. The booklet is more than just a step by step demo. (more on this later this week) To celebrate, let's talk about clouds today!

I will open the discussion with my new favorite sky quote from our friend Bob Ross.

"Clouds are very very free"

A simple statement but one that is so important to painting beautiful clouds. It is a statement that gives us freedom. It gives us permission to paint beautiful expressive clouds. It reminds us that we don't have to copy the clouds exactly as we see them. Clouds are free and so are we!


a dry wash underpainting on Canson Mi-Teintes

Sometimes we are guilty of being caught up in getting things 'right'. We are afraid to move away from our references. It can get us into trouble especially with things such as clouds. Clouds move and change constantly. A photo is just a moment in time and the clouds are frozen in a photo. It isn't natural. They may not  be arranged in a interesting way. They may even form odd shapes. When we copy these things we copy these problems. Our clouds may look stiff and heavy. We might have to explain "Well that's how they were in the photo."  So what should we do instead?

The initial layers
Give yourself the freedom to move clouds around and change them so that they support and add to your composition. Arrange them so that they become interesting shapes and so that the sky becomes an interesting negative shape. Give thought to your clouds. Allow the clouds to evolve and don't box them in. Clouds are free and so are we!

For more cloud and sky tips check out my cloud demo on Etsy

Painting information: reference photo not available (lost in a huge pile) Canson Mi-Tientes gray with Terry Ludwig pastels.

Sunday, August 07, 2016

How to Paint Beautiful Skies and Clouds....Live Demo and Booklet


'Passing Clouds'           18x24       pastel       ©Karen Margulis
available $400
 I love wide open spaces. I am happiest when I can see the sky and see the landscape unfold in front of me. Driving across the wide open spaces of Texas and New Mexico on our way to the Plein Air Convention was such a treat. Marsha Savage and I enjoyed watching the sky as we drove. We had one full day of overcast but as we came into New Mexico the sky began to open up and the clouds were magnificent.  A photo taken from the car window was the inspiration for today's demo painting.

This week for my Sunday Studio time live Facebook demo I didn't narrate the painting but instead painted to music and I painted Large! This painting is 18x24. It was fun to have a chance to paint big and get into the zone!

close-up detail

To view the demo on YouTube click here. Be sure to subscribe to my channel so you know when new videos are posted.

If you are interested in learning more about painting beautiful clouds and skies have a look at my new PDF demo booklet. I do a similar demo and give a very detailed step by step description of the painting. This is my biggest booklet yet at 50 double pages and 109 photos! I include many bonus pages so it is like having a mini workshop with me. This booklet is $10 in my etsy shop.


Sunday, January 10, 2016

New Digital Demo! Painting Expressive Flowers: Poppies in the Sun

'Summer Sun'             8x10         pastel          ©Karen Margulis
It's been a work in progress but I am thrilled to announce my newest digital demo. I am starting a new series of PDF demos for 2016....Expressive Flowers. I begin with some of my favorite flowers to paint ...POPPIES!  This is an information packed digital demo with 30 pages and 54 color photos.

If you aren't familiar with my digital demos they are step by step pastel painting demos with photos and narrative of each step. It is not a video but in some ways even better because I have taken photos of every step of the painting and spent a lot of time writing my thoughts and sharing tips about each and every step. I share photo demos on my blog but the pdf demo include a lot more information.

You can download the demo and view it on a computer or tablet. Or if you like a physical booklet you can print it out. This is demo # 13 and I am happy to share my tips for painting poppies (or really any landscape element lit by the late afternoon sun)

This new demo is available in my Etsy shop for just $7. Click here for the demo.
Click here for all of the pdf demos.

A screen shot of my new digital demo

A Sneak Peek

Bonus feature in the demo: Building a Flower


This is a pastel demo but for my acrylic and oil painting friends....the information in the demo can certainly be applied to your medium. I am approaching my oil paintings the same way I paint a pastel.

Saturday, May 16, 2015

How to Paint Daisies in Pastel Using a Watercolor Underpainting


'Daisies Make me Smile'             9x12              pastel            ©Karen Margulis
sold
Daisies make me smile!  I love to paint them but I wasn't always successful. In fact anytime I tried to add wildflowers to a painting they would look childish and sweet. I didn't want that! I wanted my wildflowers to look authentic ...to look like they belonged in the landscape and not just an afterthought. I wanted them to look as wild and free as I saw them.  But they always looked stiff and boring.

I didn't give up.  I just practiced and observed and tried different techniques.  I am still learning but at least now my daisies don't look like they were painted by a preschool child!  I have discovered ways to help me paint them better.  Last year I put together a step by step demo on how I paint daisies using a watercolor underpainting.

The demo is available as a pdf booklet in my Esty shop for $6. Click here for details 

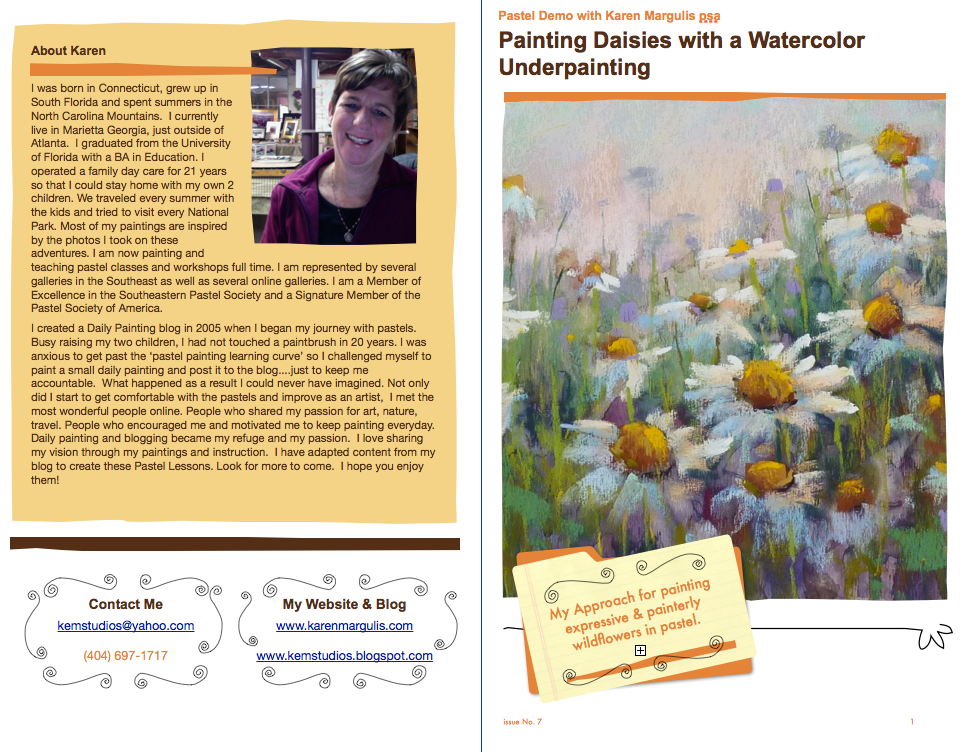
The cover of the pdf booklet
I am sharing the demo again in honor of my upcoming Wildflower Demo at the IAPS convention. You could say I have wildflowers on my mind!  This demo is 30 pages filled with 60 color photos. I have documented each step of the painting from the watercolor underpainting all the way through the layering of the pastels.  I extensively cover the watercolor underpainting stage....something I didn't always have great success with!  Through the many photos and my description you will be able to see how I work through the addition of pastel while preserving the underpainting. Here are a few sample photos:


close up photo of watercolor underpainting
sample from the pdf demo

This demo is a PDF file so you can either print it out and staple the pages into a booklet or just save it and follow on your computer or tablet. I know several artist who like to follow and paint along on their iPads.
I would love for you to take a closer look and consider giving this demo a try. I have 11 other demos available as well. They can be found in my Etsy shop.
Here is a link to the demos.

Sunday, September 28, 2014

How to Paint Expressive Trees and Shrubs..NEW Pastel Demo/Tutorial


'Morning Magic'           8x10            pastel         ©Karen Margulis
sold
I used to avoid painting trees. I didn't like my trees. They were too fussy. No matter how hard I tried I would over work them and paint too many leaves!  They didn't look good and it just wasn't fun.  Along the way my style has evolved and I finally figured out how to simplify my trees. I enjoy putting them in my landscapes now. It has taken practice and restraint to keep them simple but it is a lot more fun. Landscapes with trees don't scare me (as much) anymore.

I decided to put together my tips for painting foliage and making trees, shrubs and grasses more expressive into my next pdf demo tutorial. I am pleased to announce that it has been released today and is available for download in my Etsy shop. Here is a preview of what's inside:


This is my largest pdf demo with 29 pages and 57 color photos. I take you through the process of painting from the preparation of the paper to the finishing details.

You are welcome to follow along and paint or use the demo as an insight into my process. I have learned so much from watching demos so I wanted to offer a way to share my process.  A video would be nice but in a way this step by step demo is even better because I freeze each step with a photo and detailed commentary on each step!

How will this painting develop? What is next?

close up of the trees in progress

I now have 10 of these demo/tutorials available in my Etsy shop. They are $6 each or you can choose a set of the 5 demos (part 1 and 2) for $24.  These are digital downloads in pdf format. You can view them on your computer or tablet or print them out and staple them into a booklet!  Click on the links for more information and to purchase the demos:

New demo: Painting Expressive Trees and Shrubs

The first 5 Demos: includes a simple marsh on canson, a very green landscape, turpenoid wash/water, painting an autumn marsh, how to paint animals. 

The second 5 Demos: Includes How to paint a mini pastel, How to paint the beach, Watercolor underpainting with daisies, Winter landscape with snow, How to paint expressive trees and foliage

Here are some testimonials:
Excellent tutorial! I love the super-detailed step-by-step approach and the inclusion of little tricks and tips. It's difficult finding really good pastel 'how-to' books (by great artists whose work I admire), but your tutorials fill that gap! Looking forward to more! 

What a wonderful way to get an organized, well developed lesson in the comforts of my own home! Thank you Karen for a great lesson, I'll keep practicing!!

All of Karen's demos are fantastic--information-rich, lots of photos, detailed examples, easy to follow.

Tuesday, August 12, 2014

Adding Pastel to a Watercolor Underpainting..demo


'Back to the Wetlands'            6x8             pastel          ©Karen Margulis
sold
You just have to sneak up on it. That's the best way to add pastel to a watercolor underpainting. The beauty of the watercolor is it's transparency. Add some opaque pastel and the contrast is wonderful. Add too much pastel and you cover up the watercolor and the effect is gone. It's a balancing act. When I do a watercolor underpainting I approach the pastel application like a cat.....softly and quietly.

  • I use a very light touch....my pastel is like a feather and it dances across the paper....lightly.
  • I start by matching the colors and/or values of the underpainting. I may layer other colors but I do it in stages...and with care.
  • Every mark has a purpose and it thought out. By the time I have done the underpainting I already have the composition and value map in place. Adding the pastel is done with thought. It is when I find myself making random marks...without thought...that I overwork the painting and cover up the underpainting.
  • I am not compelled to cover up all of the underpainting. If there is a section of watercolor that I like I will leave it alone or add just a whisper of pastel. Let it breath!


The watercolor underpainting done on mat board that has a coat of clear gesso for tooth

Adding pastel by starting with the dark areas.

Adding pale yellows to the sky and the water

adding blues to the distant land

Adding golds and oranges to the grasses

Adding a few blades of grass for the final touches
If you would like to try a watercolor underpainting or learn more about them check out my digital demo  on watercolor underpaintings. You can download this pdf booklet or follow along on your ipad or tablet. Available for $6 in my Etsy shop . Click here to see details.

Sunday, May 25, 2014

Why Learning to Paint is a Lot Like Gardening

'How Does Your Garden Grow?'           8x10          pastel          ©Karen Margulis

 I will not let the weeds get the best of me.  They may have taken over the garden but with some hard work and attention I can make room for my flowers to flourish.  So I spent the morning pulling weeds and was thrilled to see my intrepid flowers filling in the garden beds. They are coming back bigger and better than last year.

As I pulled the weeds I realized that gardening is a lot like learning how to paint.

Think about it. When we decide to start a garden we have visions of this wonderful lush oasis filled with beautiful color harmony and textures.  We devour gardening books and magazines. We go to the garden center and fill our wagons with plants...one of every thing we can afford. We plant the flowers with excitement but somehow.....it never matches the visions we have.  It may be a mishmash of colors and doesn't quite look as lush and professional as we would like.


How do we make our gardens grow into the beautiful garden of our dreams?


  • Time and Attention. It takes work and lots of it to ensure our plants flourish. It takes daily attention and if we neglect it the weeds and bugs will take over.
  • Knowledge and Experience: It takes lots of study and experience to understand how to care for the plants and design the best garden....soon we will be moving plants around to make the garden better.
  • Each year the garden gets better and stronger and more mature.... as long as it is not neglected.
Can you see the parallels between getting the garden to the mature garden of your dreams and having paintings that please you?  It takes learning the basics and lots of practice  and your paintings will match those visions in your head.

When I was new to painting I found I learned best by watching demos. I needed to see what was underneath and how an artist got to the finished paintings. This is why I am creating my digital PDF demos. I want to share my painting process.  If you haven't had a look at my demos consider givng them a try. This week only I am offering a savings of 20% on any of the demos.  You can see them in my Etsy shop and use coupon code DEMO2 at checkout.