It has to be low tech and low maintenance. I want quality photos of my paintings for my blog but I don't want to spend a lot of time taking them. I need to point, shoot, upload and not have to do much editing. I have worked out a system that works for me. It is simple and takes little effort.
All I use is a point and shoot digital camera and take a photo of the painting while it is still up on the easel. Nothing fancy. I just point and shoot and keep the flash on.
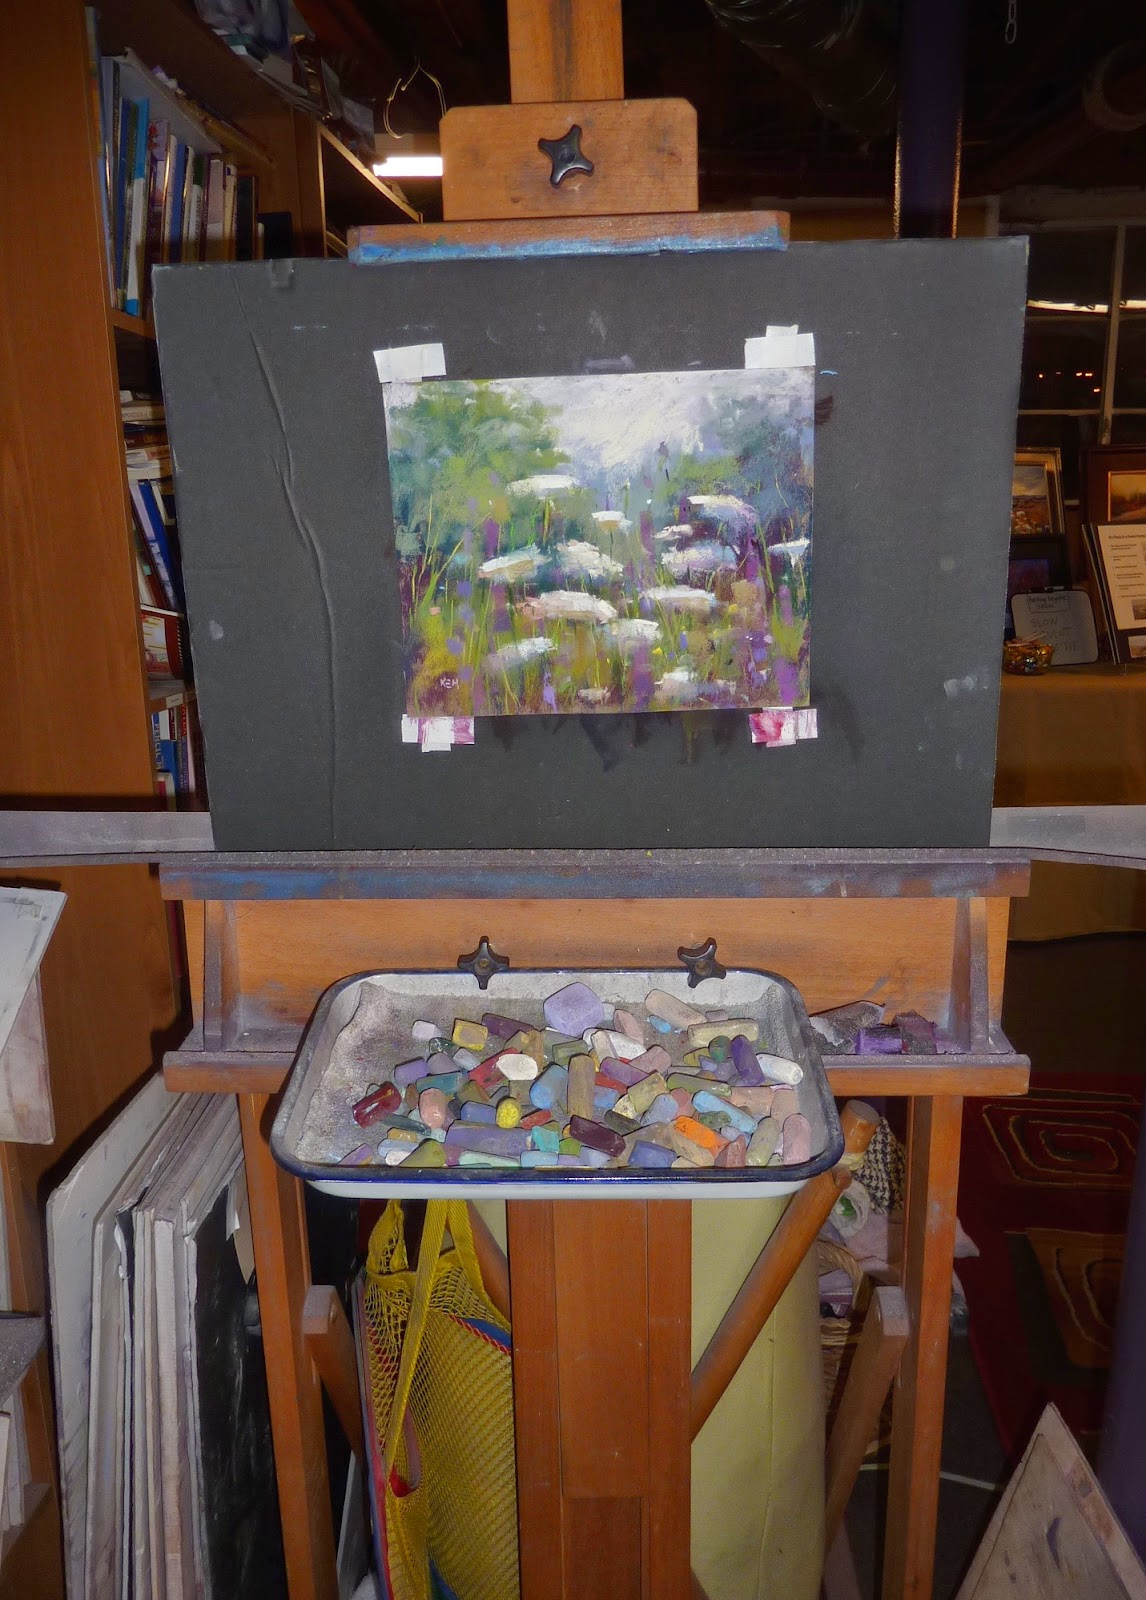 |
| My easel and current painting. When I am finished painting I take the photo |
Keep in mind this is the set up I use to take low resolution photos for blogging and for email. I also use them to print small photos and for my business cards. If I need higher resolution photos I will increase the quality setting on my camera to high (about 10 megapixels)
- I use a Panasonic Lumix digital camera set on a medium quality setting.
- I always keep the flash on.
- I don't use a tripod but I do have steady hands.
- I stand about 4-5 feet from the painting and zoom into the painting. I don't crop it in the camera but leave a bit of the foamcore showing.(I will crop it when I upload the photo to my computer)
- I have two fluorescent light fixtures over my easel area. I keep a warm and cool bulb in each.
- This balance of light along with the camera flash results in color that is very true to my paintings.
- I upload the photos to my computer. I have an iMac and use iPhoto. I crop the photo in iPhoto. Occasionally I need to adjust brightness, contrast or saturation which is easily done in iPhoto. 95% of the time I don't have to make adjustments.
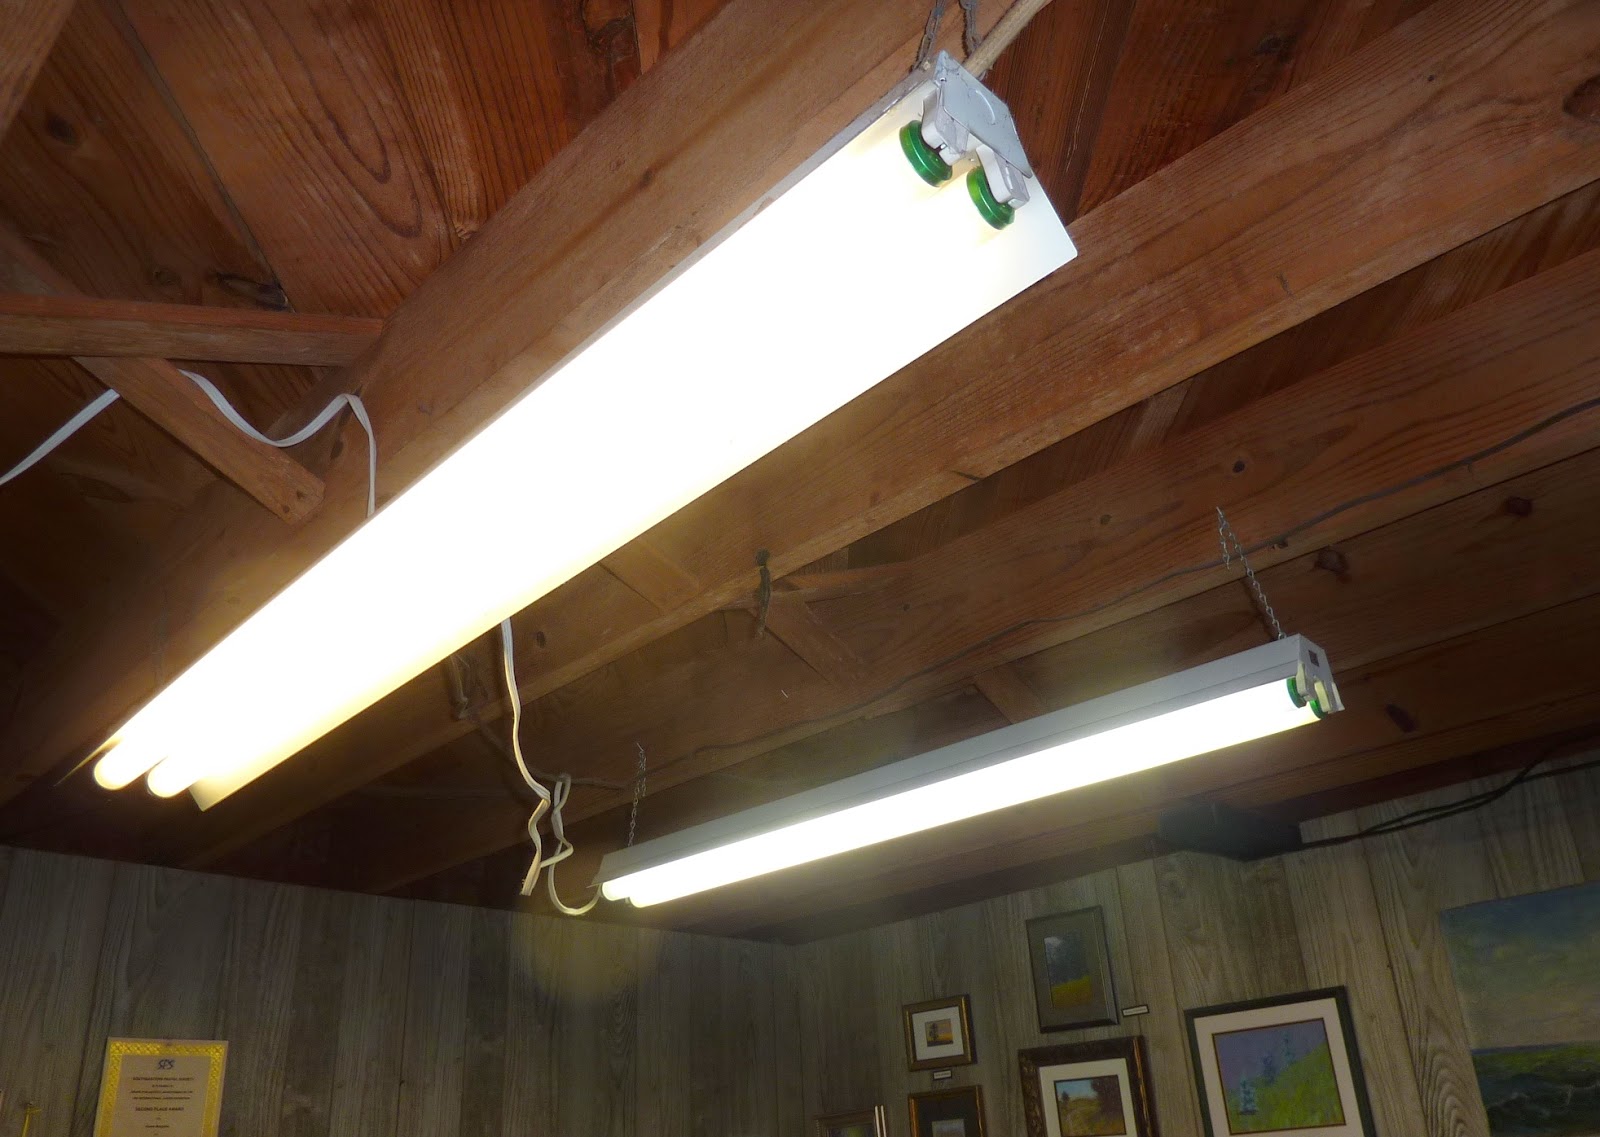 |
| My fancy lighting! |
This system works well for me. Since we all have different lighting situations it will take some experimentation to find the correct balance of light to get the truest colors. If your photos come out too warm or yellow....try turning on the flash and stand back about 5 feet.


5 comments:
Hi Karen,
I just used my to PDF ap and I now have this info stored in my "I Books". Great information! Thank you.
I really struggle with getting true colours, even with the good DSLR. I use a Lumix too, it is a great camera for general shots, I agree.
That sounds like a cool strategy. Actually seeing your gray foamboard, I can see how that would help keep values accurate along with colors.
I use my Kindle Fire HD which has the best camera I've ever owned, and I got used to the yellowish lighting in my room. I prop the art on my leg at an angle so my shadow doesn't cross it and focus on an area of the painting that's either light or dark depending on what I need - usually take several shots with different focus.
My hands aren't that steady but if I brace it right, one n four or five comes out not blurred. I put that one in GIMP to crop and adjust perspective if I got the angle wrong, then use the color settings to correct the light - that part is actually consistent regardless of the painting. I knock Contrast up a notch and Saturation up a notch and that usually looks true to the art.
So I got pretty good at using GIMP to compensate for the camera's shortcomings, though the better the camera the easier that's been. Since I can't afford a DSLR and the Kindle was a gift, I'm happy to have it. It outdoes my iPhone4 by so much I'm amazed. And that's on auto settings!
Karen, have you ever used these photos to create prints of your work? I currently have my paintings professionally photographed for prints, but would love to save the expense.
Thanks for chiming in!! Dana, I don't use the photos to make prints. I sometimes have photos printed to use for cards but that is about it.
Post a Comment