- There is a fun and easy way to add texture to a pastel painting. It starts BEFORE painting. You simply brush on some CLEAR GESSO to your favorite paper and let it dry. The clear gesso has a slight grittiness and this combined with random brushstrokes creates a textured surface to paint on.
- If you want a rougher surface you can add powdered pumice to your gesso but I find the clear gesso to be sufficient.
- You can also use the gesso on any pastel paper including unsanded papers. Watercolor paper is a great paper to use.
- You apply the gesso to prep the paper. If you want to use it during the painting be aware that the gesso will liquify the pastel creating darkish mud. (which is sometimes just what you need!)
The sunflower painting is done on Canson Mi-Teintes paper that I coated with clear gesso. The painting below and the commentary is another one done on a clear gesso and pumice surface. Enjoy the post from the archives.
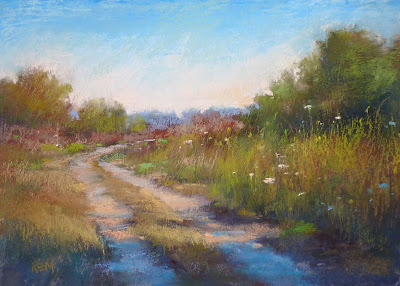 |
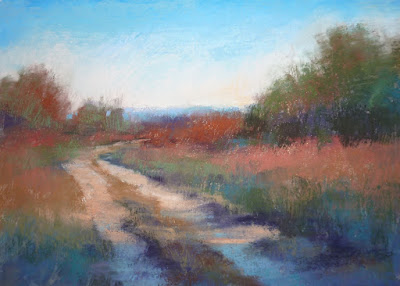
'Sunny Days' 10x14 pastel ©Karen Margulis sold
|
I needed a little sunshine today. After painting snow for the last few weeks it was time for a landscape filled with sunshine. There is no better way to showcase the sunlight than with the addition of shadows! With that thought in mind I made a plan for today's painting. I'm taking you behind the scenes and inside my head as I share the thoughts behind the making of this painting.
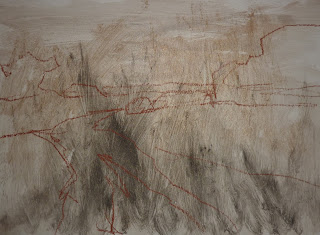 |
| a home made board with some fun texture |
I had leftover clear gesso and pumice concoction. I am working on a big painting and added texture this morning with the gesso and pumice powder. I didn't want to waste my concoction so I covered a piece of mat board with the leftovers. I added some gold Schminke powder just to see what would happen but I think I was too stingy with it and it didn't do much of anything.
After the board dried I drew my scene with a piece of Nupastel. I was drawn to this scene because of the wonderful light on the grasses and bushes. It would be a fun challenge to paint the shadows so the sunlit areas would be the star.
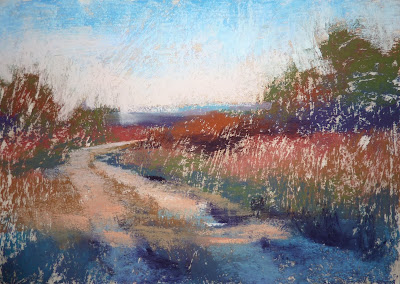 |
| Blocking in the big shapes with mostly warm and cool colors |
Next I blocked in the big shapes with one layer of color. I selected warm colors for the sunlit areas and cool colors for the shadows. You can see the ridges of the ground created by my brushstrokes. I didn't want the white of the board to be a distraction so I rubbed in this first layer with a piece of pipe insulation foam.
 |
| Rubbing in the first layer |
Now I was left with a soft out of focus landscape. It was just a matter of adding detail and clarity where I wanted it. I began by reinforcing the colors in each shape.The texture of the board created an instant suggestion of grass and foliage. It also made it easy to keep my shapes simple.
 |
| Reinforcing the big shapes |
It was now time to layer the colors in the trees and grasses. I reminded myself to use cooler blues and greens in the shadows and warmer oranges and yellows in the sunlit areas. I gradually added warmer and brighter colors in the sunlit grasses until I felt like they were sunny enough.
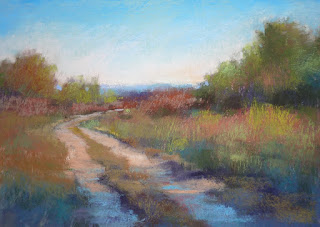 |
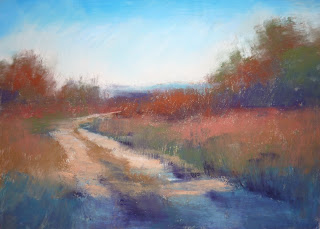
| Ready for the details |
Once all the colors were in place it was time for the smaller details. The texture already suggested grass so I only needed to put in a few pieces of grass and hints of flowers. I also reinforced the light and shadows on the pathway.
 |
| Not quite satisfied |
With the addition of a few bright green spices I called the painting finished. I took a photo and was getting ready to upload it to the blog when I realized the blue shadows on the path were not quite right. They were too light and bright. It didn't look like shade. So it went back to the easel for a correction! It was an enjoyable afternoon immersed in the sunshine! What's on your easel today?
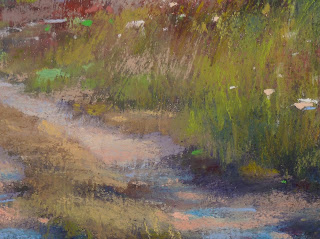 |
| close up of the texture |


3 comments:
Awesome information! Thank you. I do have a question, Is it possible to laminate pastel minis?
Thanks again for any information you could give me.
Hi Beth, I’ve never laminated minis but I imagine you could. It would be good for saving but not for selling.
I apply the clear gesso to colored matboard. Hope there's no reason it's not recommended! Assuming the matboard is archival.
Post a Comment