Visit my Patreon Page for more painting instruction and Paint Along Videos!

Thursday, August 30, 2018

Finishing a Workshop Demo

'A Little Piece of Heaven'           13x18        ©Karen Margulis
available $195
 I just got back from an amazing time in Kentucky. We took our little pop up camper Bertie the Art Spirit and camped while I taught a workshop. We also spent 4 nights camping with my kids and grandkids. It was so much fun and we are hooked on the camping thing. Here is our setup in the Kentucky Horse Park in Lexington.

I have started an Instagram for our camping and painting adventures with Bertie and I'd love for you to follow me. You can find it on Instagram @campingwithbertie  


The workshop I taught in Lexington was a 3 day plein air workshop held at the gorgeous farm of one of the artists. There was so much to paint there! The artists in the group were warm and welcoming and very talented. It was a pleasure to share with them.  The weather cooperated for the most part. Except there were no interesting clouds after my sky demo and talk! And rain threatened all day on our last day. Because of the forecast I  planned to spend the last afternoon inside doing the artist choice demo. For this demo, the artists vote on the photo I will paint. There was a 3 way tie this time and the marsh came out on top in the toss.

Even though it wasn't a plein air demo, the marsh was a good subject to end the workshop with since there was no creeks or ponds on the farm!  Here is the demo in it's unfinished state.

The unfinished demo
 I took this painting home and added some finishing touches. I love marshes. I think we need to plan a camping trip to the Lowcountry with Bertie!

Demonstrating how to make water a  part of the landscape


Workshop News!
I will be teaching a workshop on November 3 & 4 with Nancy Nowak in Nancy's studio here in the Atlanta area. We will be announcing it this weekend but I wanted to give my readers a heads up. The cost is $250 for this team workshop. Send me an email if you would like more information.

Wednesday, August 29, 2018

How Many Bees Are Enough?


'Feed the Bees'         9x12         pastel       ©Karen Margulis
available $165
I admit it. It is easy to get carried away. When something is fun and it works it is tempting to keep doing it. But then there is a risk of overdoing it. I went a bit crazy with my bees today! They are so much fun to put into a painting and I really wanted to capture the feeling of bees buzzing all around a mound of flowers. If one bee is good then shouldn't four bees be better?

When the painting was finished I showed it to my husband. I was happy with the colors and the underpainting and the little bees. But he wasn't as enthusiastic!  "Look at the bees....they are all flying in the same direction" he said. Hmmmm I took a closer look and had to agree but it was worse than that. The four bees were spaces almost in a perfect rectangle. They were too similar in spacing, size and direction. I had not noticed this but it is something that happens all of the time. Our brains create order but order is boring!
Before removing the extra bee
I put my finger up to cover the lower right bee and it was a subtle but welcome change. (try it) It was easy to brush this little bee out of the painting and repaint the pink flower. Now I had a staggered and unequal number of bees. It was much more pleasing even though it was such a small change.

So how many bees are enough? It is up to the artists but as I discovered odd numbers are more pleasing. And be careful of using too much of a good thing!


My watercolor underpainting done with Cretacolor Aqua Briques

Tuesday, August 28, 2018

New Video Released! Paint a Daisy Demo


'Reach for the Sun'           8x10         pastel         ©Karen Margulis
available in my Etsy shop $150
I never get tired of painting daisies. They are such a cheerful flower. But it is very easy to paint daisies that look like a child did them. There is a good reason for this and a solution to this common problem. I just released a video demo that was previously only available on my Patreon page. In this quick video I share thoughts on painting believable daisies and do a quick demo. Click on the link below to go to my Youtube channel for the video.


The watercolor underpainting for today's daisy painting

If you like my videos you will enjoy my Patreon page. I just finished a 3 part video series on painting with a watercolor underpainting. You can see the painting on this page come to life! It is a $4 monthly subscription but worth it! I work hard to provide great content! www.patreon.com/karenmargulis

Monday, August 27, 2018

Make Time for a Mini Series

'Provence Impressions I'          2.5 x 3.5 inches      pastel         ©Karen Margulis
available in my Etsy shop here $25 
 I was in the mood to paint some minis. I enjoy painting very small pastels once in awhile. It is a good way to paint when you don't have time to get into the studio. I work at my dining table and watch TV. I have a small box of pastel bits and pieces and precut paper so it is easy to pull out this box when the mood strikes.

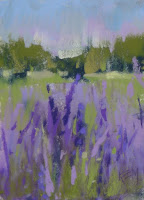
I really didn't intend to paint a series but after the third lavender painting I knew a series was born! With each little painting I felt more comfortable with the subject of the lavender fields. I was able to explore various angles without investing a lot of time and paper.  The series was giving me ideas that I could use for larger paintings. An added bonus was that I was using my scraps of sanded papers!

From now on I will remember to explore a new subject with a series of minis! Give it a try!


My mini pastels with some of the pastel pieces I used


All of these paintings are available in my Etsy shop for $25 each. They make wonderful little gifts and are great in little groupings. See them all up close in my Etsy shop: www.etsy.com/shop/karenmargulis

Friday, August 24, 2018

Abstracting the Landscape for Fun!

'Lavender Deconstructed'         9x12        pastel         ©Karen Margulis
available $150
I have a fascination with abstract painting. There is a part of me that wishes to be able to see more abstractly. Every once in awhile I get on a kick to simplify my paintings . I don't mean to change my style. I mean to play around with other ways of expressing myself. I think it is good for us to explore other directions. You just never know what you might bring back to your work.

Today I decided to use the pastels from yesterday's lavender field painting and try for a more abstract painting of the lavender. It is hard! I wanted to pull it together and making more representational. Even now I can see how the painting has good bones and I could definitely develop it into a more realistic landscape.

 While I had these fun colors out on my tray I decided to try another one. This time on deckled edge brown paper. I sure was fun to play today!

'Summer'       10x10        pastel    available         $125


Thursday, August 23, 2018

A Tip for Painting the Greens of Summer

'Summertime'          8x10      pastel      ©Karen Margulis

Enjoy this post from the archives while I am away teaching a workshop!

I live in the 'Land of Green'.  The Southeast is a beautiful part of the country especially if you like green.  In the summer you will find every shade of green in the hills and trees. It can be a challenge to paint the summer landscape and make some sense of all the green. Of course with pastels we never think we have the right green no matter how many pastels we have. I encourage my students to find ways to make the greens they do have work for them. I'd like to share my favorite tip...Lay out your greens before you start painting.

The palette I used for 'Summertime'
I always lay out all of the colors I will use in a painting before I start. I like to have a starting point with my color choices. I may add or take away during the painting process but I always keep the pastels I am using separate.
In the photo above you can see I have set aside some darks, some sky colors and some hay bale colors. I have also pulled my greens. I take the greens a step further and line them up as best I can by value and temperature.  This helps me when I start painting a green landscape.
 I know that generally the greens are cooler and lighter in the distance and get warmer and more intense as they come towards the foreground (there are always exceptions but this is true a good bit of the time)  Now when I start painting the greens I can more easily see the cooler vs warmer and darker vs lighter greens.
 When your green pastels are mixed in with all of your other colors it is harder to judge what kind of green it is. Putting them all together helps you see the temperature and value more easily. Now I can paint my meadows and trees more intuitively without having to hunt for the 'right' green.

My chart of meadow colors
We all have different brands of pastels and so our green collections are all different. I made a chart of my greens so I could see if I had enough variety of cool vs warm and light vs dark and greyed greens vs more intense greens. It was a great exercise in seeing and it helped me see where I was lacking in greens. Sometimes we have trouble deciding if a color is warm or cool. What I do is take a really yellow green one that is obviously warm. Then take your pastel and hold it up to this warm green. Ask yourself if this pastel seems to lean more to blue or to yellow. The more blue you see the cooler the green. Comparing a stick to one you are sure of will help.  I encourage you to make a chart of your greens and try a green painting!


Wednesday, August 22, 2018

Dealing with the Greens of Summer


'Summer Green'            8x10        pastel        ©Karen Margulis
SOLD


Are you dealing with the greens of summer? This post from the archives will give you some tips!

It's been raining in Georgia just about everyday this summer. So everything is very lush and green. My weeds are out of control. But it's raining so I spent the day inside painting instead of pulling weeds.  I decided to paint a summer landscape from a tiny photo I took of a roadside mountain stream.  I took some progress photos so follow along and see how I tried to make a very green landscape interesting.


I started the painting on a piece of Uart 600 grit paper with a loose charcoal drawing. I then underpaint the shapes with some orange and red NuPastels. I blend in the Nupastel with a piece of pipe insulation foam.  I chose the reds and orange because I knew I would be adding a lot of green. So in using the compliment of the greens I would make the greens more exciting.


I started blocking in the dark shapes. I am now using soft pastels. This painting was done only using Terry Ludwig pastels. Next I put in the bright yellows in the sunlit areas of the grass. One of the things I liked about this scene was the strong light and shadow patterns so I wanted to be sure to get them in place early on.


I am using a variety of greens from Terry Ludwig's green set. I have some dark cool greens in the distance and shaded areas.  I then put in the sky using a very pale blue green. I also use the same colors in the water.  I try to break up the shape of the trees with sky color.


I now introduce some purple in the tree trunks and along the banks. One of my favorite quotes from Richard McKinley is about the secret of green. He says the secret of green is orange and violet is the friend.  I like to keep this thought in mind when I am dealing with a lot of green in the landscape. In this painting the orange is the underpainting and the violet is the little touches I put in as I finish the painting.


I continue building up the layers of green. I am using bold strokes. I want to let some of the orange peek through and the bold stokes keep me from overblending the green and orange which could make the greens look muddy. I add the final punctuation marks such as the orange in the tree trunks and little purple marks in the grass.


Tuesday, August 21, 2018

Knowing When to Quit

'Deep in the Daisies'          11x14        pastel         ©Karen Margulis

 It is the most challenging thing about painting. Knowing when to stop and actually STOPPING. It is especially challenging when working with an interesting underpainting. How much is too much? How do we keep from going too far and covering up the wonderful underpainting?

You've probably heard the familiar advice. Take a break. Put a frame or mat on the painting. Turn it upside down. Look at it in a mirror. Make sure the value in the underpainting is correct. (otherwise we cover it up trying to get it right.) Gradually build up your marks rather than making drastic changes. All of this is great advice. But it still is a challenge.

How about a little reminder from our friend Bob Ross.

“It gets to feel good and you want to just keep doing it, but the key is restraint.”  — Bob Ross

close-up of a daisy
I love this quote. It is so true. We get painting and we start to enjoy the actual act of painting. We might even like what we are doing. But too much of a good thing isn't good! Stop sooner than later. Have restraint and don't overdo and overwork.  I could have painted grasses around my daisies all day long. It felt good! But I had to make myself stop and call it done. Thanks Bob for the reminder!

Sunday, August 19, 2018

A Summer Painting Assignment

'Summer Love'         6x8       pastel        ©Karen Margulis

School is starting for many. The stores are filled with Halloween decorations and fall attire. Where does time go?  But then I realize it is still August! Summer is still with us. In fact we are just out of the so called Dog Days of Summer...those hot and sultry days that leave us feeling lazy.

dog days. the sultry part of the summer, supposed to occur during the period that Sirius, the Dog Star, rises at the same time as the sun: now often reckoned from July 3 to August 11. a period marked by lethargy, inactivity, or indolence.

I love autumn and the changing of the seasons but there is no need to rush it. I am pledging to enjoy these long hot days of August. I want to savor the sights, smells and tastes of summer. A delicious garden tomato or a ripe juicy peach. The smell of freshly mown grass. The buzzing of the bees. The fields overflowing with my favorite wildflowers. All the things that inspire me and make my heart sing.

Then followed that beautiful season... Summer....
Filled was the air with a dreamy and magical light; and the landscape
Lay as if new created in all the freshness of childhood.
~Henry Wadsworth Longfellow
Join me in savoring the last month of summer. I am giving myself an assignment and I invite you to join me. I am making a list of my favorite summertime memories. I will then choose one each week as inspiration for a painting. I'll begin with my favorite summer motif.....Queen Anne's lace.

Enjoy and paint the lazy days of summer!

Friday, August 17, 2018

A Few Tips for Painting Poppies

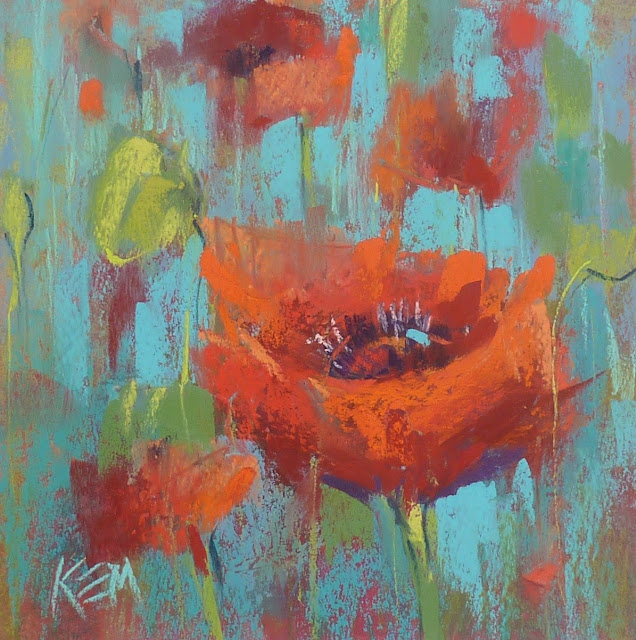
'Taos Poppies'           6x6         pastel        ©Karen Margulis
available $95
I love to paint poppies and have discovered some tips to achieve a more painterly flower. I have blogged about painting poppies before but I thought you might enjoy these tips!

  • I don't draw the flower first. I simply draw a circle shape where I want the flower to go. Then I use the SIDE of my pastel to paint large shapes that make up the petals. If I draw my flowers I tend to want to color them in and they look stiff.
  • I use three or four values of the poppy color to develop the flower. Even if I don't see it in the photo I like to begin with a dark, brick red shape (for red poppies). I add middle values to create the form.
  • I avoid using a pale or very light value red to paint the highlights. I find light pastels with too much white in their makeup lead to washed out flowers rather than vibrant flowers.
  • If I want my poppies to appear sunlit I will use a warm color such as red-orange for the light areas.
  • I consider the background as I develop the painting.I don't wait until the end and throw in a background. I often use a color found in the poppy OR in the case in this painting I added a pop of turquoise in the flower after I put in the background.

Thursday, August 16, 2018

Don't Throw Away Those Pastel Bits!

'Island Time'         8x10        pastel        ©Karen Margulis
available $150

It is an inevitable result of painting. Pastels wear down. They break. We are left with bits and pieces of once favorite colors. My big studio box is filled with these tiny pieces. I can't bear to part with them. But they are really too small to use. Or are they?

Don't throw them out! Bits and Pieces of pastel can be used. We can always crush them and make new pastels. I have not done this but it is on my list of things to try. I use my pastel bits in two ways. I save them for my tiny travel kits.  I also put them in my 'spice jars'.

My collection of pastel spices
Every painting needs some spice. I consider spices the small finishing touches. Those bits of eye candy that help lead the viewer through the painting. Little spots of color that the viewer can savor. Spices can also be small areas of texture from a heavier application of pastel. Little bits and pieces of pastel are the perfect size to make these small spicy marks.

When my pastels get too small to hold comfortably I put them in little containers. I like to use plastic baby food containers. They are small, can stack and allow quick and easy access to the pastels. Any color can be used as spices. It depends on the painting. If you are organized you can keep colors separated. I am not that organized so I tend to have a mix of colors in my spice containers. I choose the spice color by scanning my containers and choosing the color that I think will work.

My color choices are mostly intuitive but if I am not sure of the right spice color I will use a color wheel. See my post on choosing spice colors here.

The photo below shows the painting at the end of the video demo I did for my Patreon page. This is before I added the spices. Can you see what I added?


Before the final spices


Wednesday, August 15, 2018

Just Let Yourself Go!

'Lavender Gone Wild'           11x14        pastel         ©Karen Margulis
sold
I was struggling. I had this vision of what my painting should look like and it just wasn't working. I had already done a small study of the lavender fields at dusk and it worked on a smaller scale. But I wanted to try it a bit larger. I took out a piece of white Pastelbord and started with an alcohol wash. (you can see a quick video on my Instagram @karenmargulis)

It was a struggle once I started applying the pastel. Part of the reason was the surface. I don't use Pastelbord very often and it accepts the pastel in a way I am not used to. But part of the reason was also the subject itself.  My concept was interesting with a sunset glow over the dark blue violet lavender.....but my composition wasn't very interesting. Even my non- artist husband noticed that I had created three even boring sections. See the painting below.

I wasn't happy with the painting even though I signed it. 

I wasn't happy with the painting but I had spent all day off and on fussing with it. That is a lot of time  for me. I really didn't want to give up but I was tired of the painting. I decided to just let myself go wild with some texture. What could I lose?

I brushed off some of the pastel and applied some clear gesso to the trees and lavender. Look at how dark it became! That was ok because now I had some good dirt as a base. I needed to let my ideas percolate....and let the gesso dry. Since I had such a frustrating day in the studio I decided to paint a few minis while watching TV in the evening. I redeemed myself with those (I'll share them soon)

The dry gesso over pastel

In the morning I looked at the painting and realized that I could totally change the composition very easily. I didn't need to keep the sunset theme either. Inspired by one of my minis I started over. I blocked in the shapes of the new composition with a piece of Nupastel. It was more interesting and the brighter purples made me happy! The texture also worked to create the suggestion of the lavender and grasses.

In the end I was much happier with the painting. I could have easily stopped yesterday unhappy and frustrated with the painting relegated to the discard pile. But I allowed myself permission to brush it off and start over. I allowed myself to just let go and see where it led me. It was more fun than being frustrated!


The new composition over the old painting


a close up of the lavender texture

Tuesday, August 14, 2018

How to Improve Your Summer Green Paintings

'Sweet Summer Meadows'         10x8        pastel       ©Karen Margulis
sold
Yesterday I went crazy with green. I wanted a very green forest scene. I wanted the viewer to be enveloped in greens. So I did an underpainting with the local color of green. It worked.  But usually I am looking for relief from too much green in a landscape. I am looking for ways to make the green more interesting and easier on the eye.

This painting demonstrates how I used another color UNDER the green to make it feel more natural and interesting. I wanted to infuse my meadow with warmth and sunlight so I chose a warm color for the underpainting. I also used clear gesso to add texture to the meadow.


close up detail of the texture
Here are the pastels that I used for this painting. I blocked in the big shapes of the underpainting with these pastels and created a value map. It was easy to follow my map to build up the layers of the meadow.

A range of values for the underpainting

click to enlarge and see the texture
It is interesting to compare the very green painting with this tempered green landscape! It is nice to know we have options in underpainting.


You can see a detailed step by step photo demo of this painting today on my Patreon page. It is $4 a month to join but now is a good time to check it out. Cancel at anytime! www.patreon.com/karenmargulis